How to Connect Printer via Ethernet Cable with router
Connecting a printer sometimes becomes a headache if not guided properly. Therefore, here we’ll guide you on how to connect printer via Ethernet cable with router.
Firstly, you must know that your laptop or desktop computer cannot be connected directly to the printer that’s why a connection through a router is required.
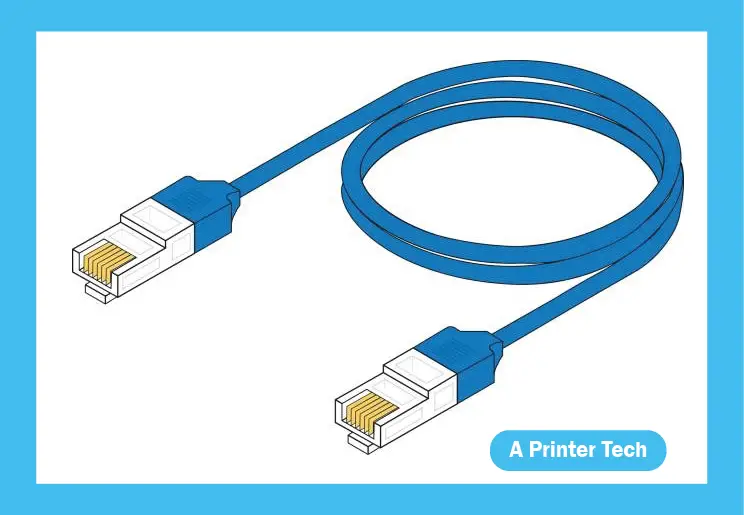
Oftentimes, printers do not come with any Ethernet or USB cables. So, you would have to purchase it separately or if you have it already, then you can also use that one.
What is an Ethernet connection for a printer?
Before knowing how to connect printer via Ethernet cables with router, let’s have a look at what is an Ethernet connection for a printer.
Ethernet connection is an indirect wired connection from a printer to a laptop or desktop computer. This indirect connection could be via router, hub, or switch.
Benefits of Ethernet Connection over Wireless Connection
Some of the factors that might lead you to connect your printer through Ethernet rather than connecting wirelessly are:
Ethernet connection is faster than the printer’s wireless connection as there is low latency
There is no interruption of signals
Ethernet connection is more reliable than the wireless connection
Ethernet connection is considered more secure as it has higher security levels and is not much prone to attacks unlike wireless connection
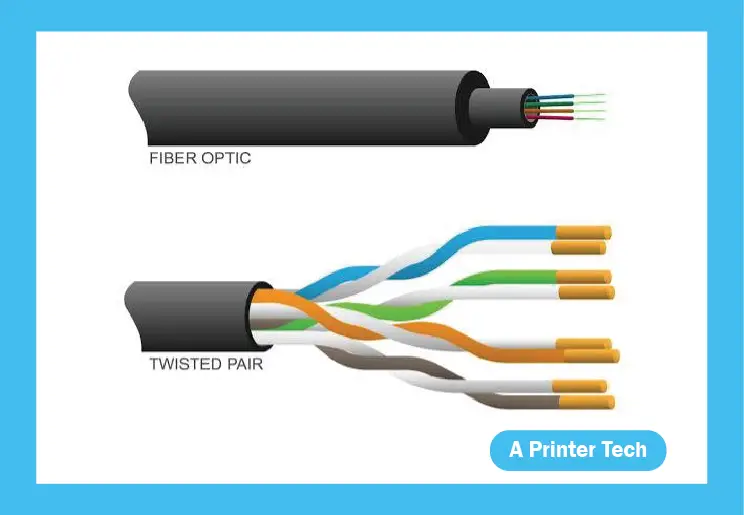
Types of Ethernet
To connect printer to router with Ethernet cable 2 types of wires are used:
Twisted Pair – has metallic conducting wires
Fiber Optic – has a glass fiber
Moreover, there are 3 types of Ethernet Connection:
Basic – Slowest of all and works at a speed of 10 Mbps
Fast – Faster than basic and works at a speed of 100 Mbps
Gigabit – Fastest of all and works at a speed of 1 – 10 Gbps
How to Connect Printer via Ethernet Cable with router?
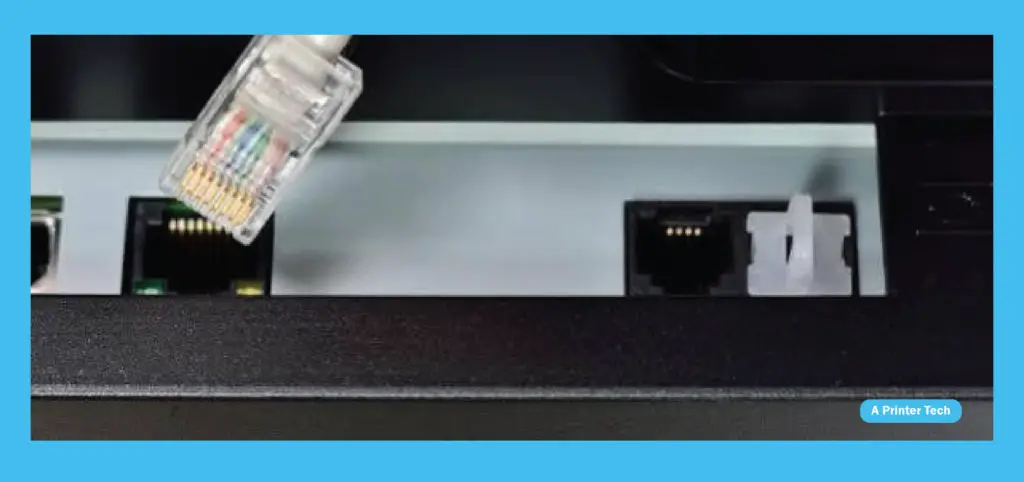
Now, first of all, make sure that your printer supports an Ethernet connection and has an Ethernet port which is mostly on the rear side of the printer.
Hence, after assuring follow these steps for successful connection.
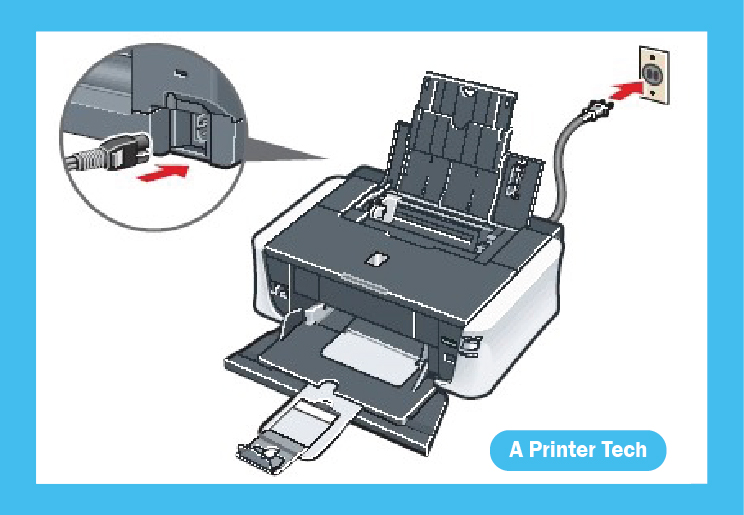
Look for the Ethernet port in your printer and insert one end of the Ethernet cable in that port.
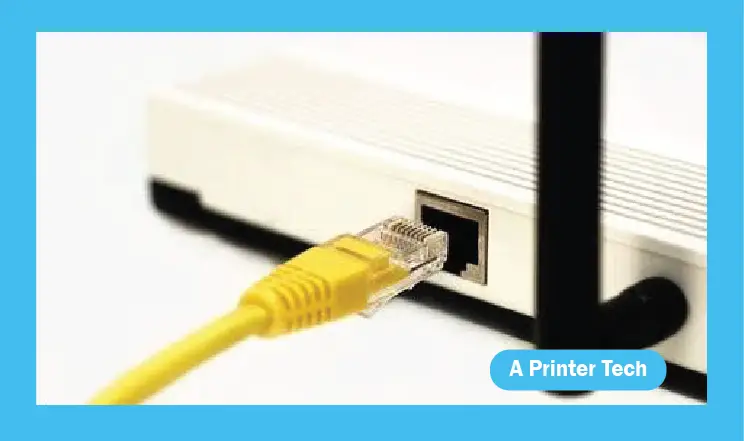
Look for the Ethernet port in the correctly configured router and insert the other end of the Ethernet cable in that port.
Plugin your printer and turn it on.
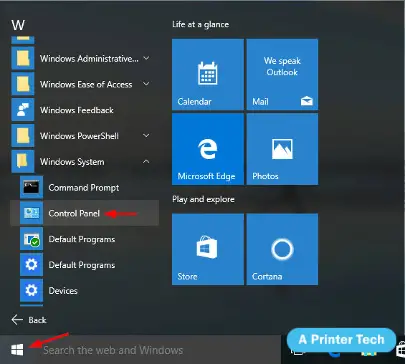
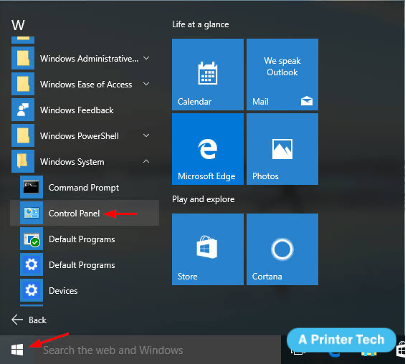
On your laptop or desktop, navigate to:
Start > Control Panel
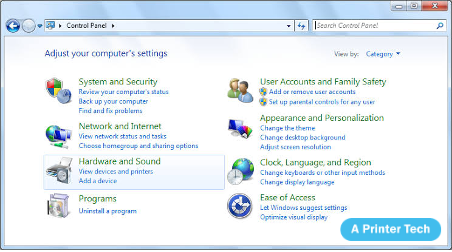
Control Panel > Hardware and Sound
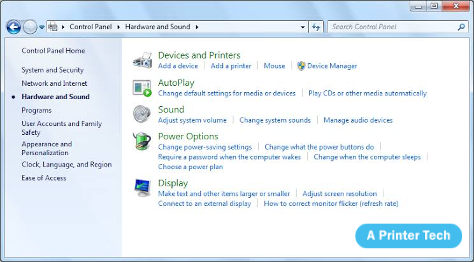
Click on ‘Add a printer’ in the ‘Devices and Printers’
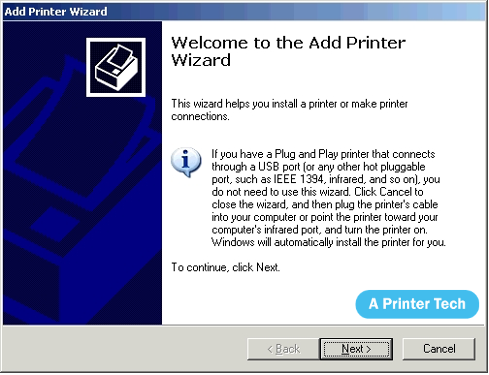
An ‘Add printer Wizard’ window will appear. Click on ‘Next’.
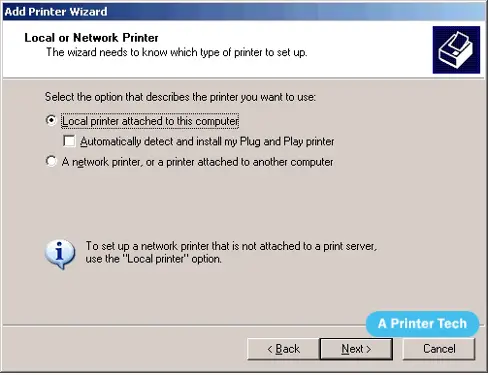
Select the ‘Local printer attached to this computer’ option and click on ‘Next’.
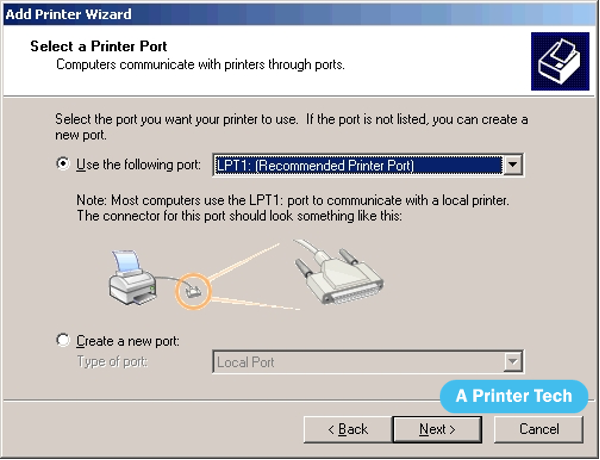
Use the default LPT1 port and click on ‘Next’
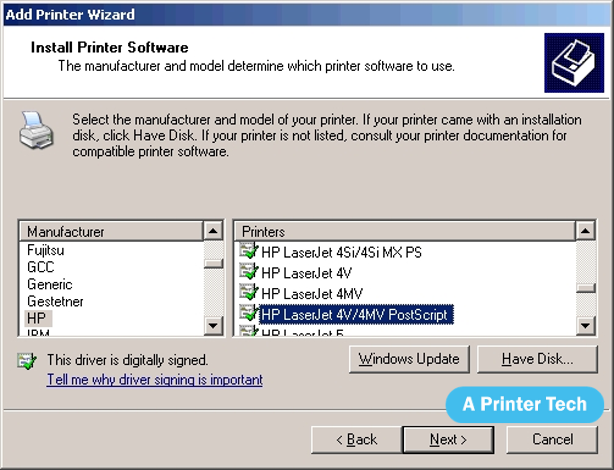
In the manufacturer’s section, select your printer’s respective manufacturer. In the printers section, select your printer’s respective model.
Insert the CD with correct drivers in your laptop or desktop, then click on ‘Have Disk’ and select the drive. After that click on ‘Ok’ and then on ‘Next’
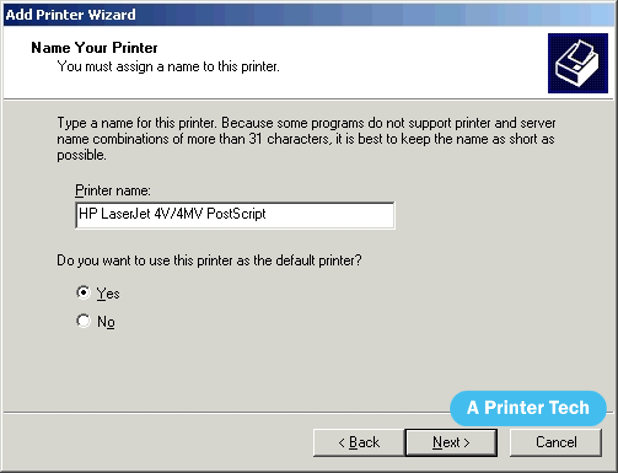
After that, a printer’s name box will appear, type the name of your printer in that box then click on ‘Next’. The installation of drivers will begin.
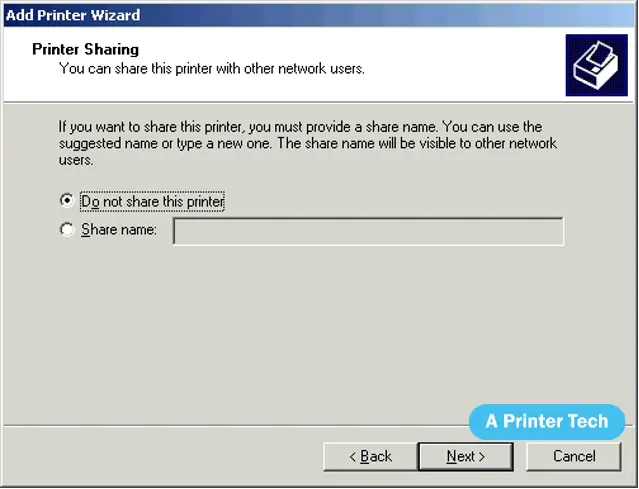
After successful installation, if you do not want to share your printer on the network, then click on the ‘Do not share’ radio button and click on ‘Next’
or
If you want to share your printer on the network, then fill in the share name, location, and comment box. Then click on ‘Next’.
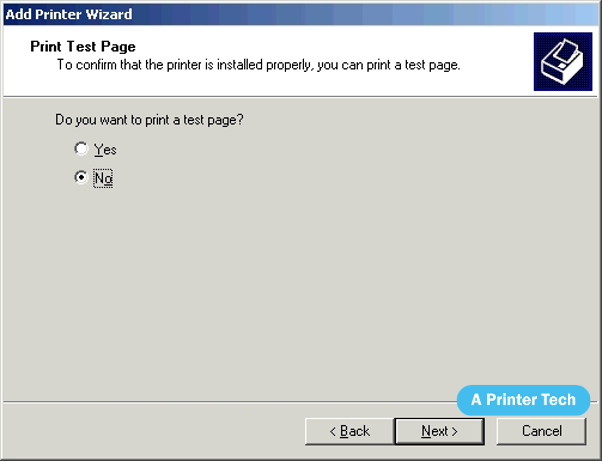
Print a test page if you want to.
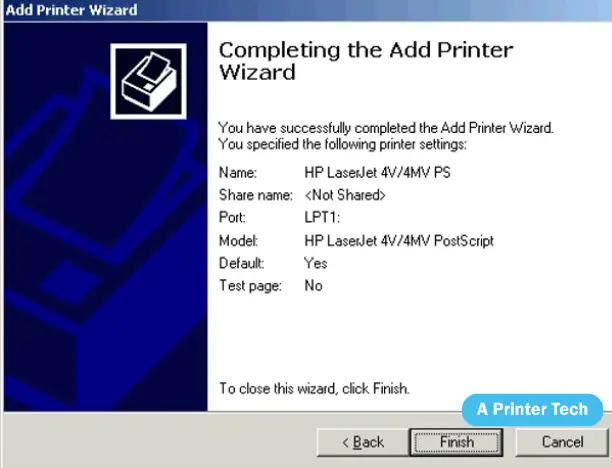
Click on ‘Finish’ to complete the installation
How to Connect Printer via Ethernet Cable with router if Windows does not detect your printer automatically?
If Windows does not detect your printer automatically, then you would have to add the printer by IP address by following these steps:
On your laptop or desktop, navigate to:
Start > Control Panel
Control Panel > Hardware and Sound
Click on ‘Add a printer’ in the ‘Devices and Printers’
An ‘Add printer Wizard’ window will appear. Click on ‘Next’.
Select the ‘Local printer attached to this computer’ option and click on ‘Next’.
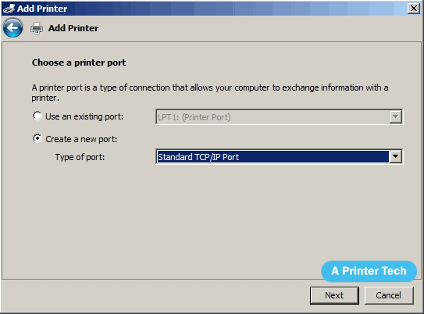
Select the ‘Create a new port’ and from the port drop-down list select ‘Standard TCP/IP Port’. Then Click on ‘Next’.
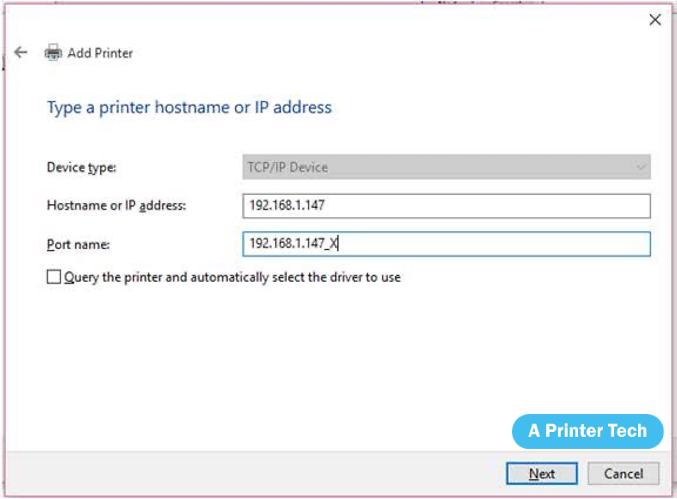
Fill in the IP address and port name box. Then select ‘Query the Printer and Automatically Select the Driver to Use’ and click on ‘Next’.
After successful installation, if you do not want to share your printer on the network, then click on the ‘Do not share’ radio button and click on ‘Next’
or
If you want to share your printer on the network, then fill in the share name, location, and comment box. Then click on ‘Next’.
Print a test page if you want to.
Click on ‘Finish’ to complete the installation
Conclusion
Now you know how to connect printer through LAN cable. Thus, you can easily bring your printer to work with an Ethernet connection and you won’t have to face setup issues anymore.
If you’ve completely understood how to connect printer via Ethernet cable with printer, then connect HP printer through Ethernet cable or any other brand printer in a similar way. In case, your laptop or desktop computer does not detect your printer automatically, then you can follow the steps of adding a printer through its IP address.