What is a thermal printer?
I can bet, once in your life, you have come across printers, but suddenly if someone says have you ever used a thermal printer?
Boom!
You are blank!
Well, not after reading this article, after reading this article you will know exactly what a thermal printer is, why we use this and how it works.
Let’s not waste time and get straight into it!
What is a thermal printer?
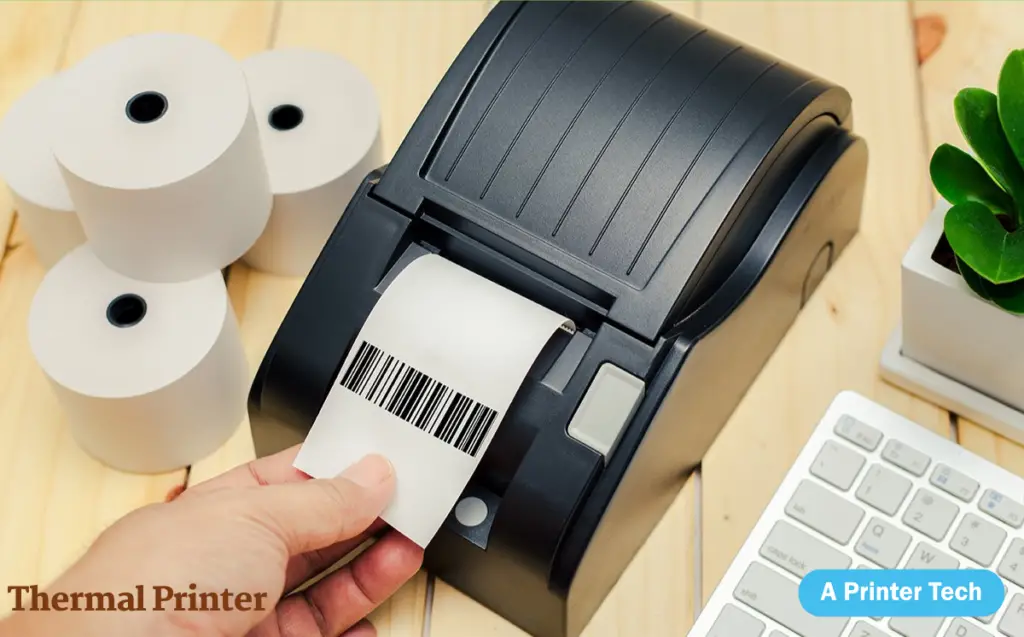
A thermal printer is a type of printer that uses heat-sensitive paper and an electric heater to print text and graphics.
Basically, it’s a normal printer but the paper it uses is heat sensitive. You cannot use normal plain papers with this as it will not print anything on it if you do so.
So after knowing what it exactly is, now we move onto how does a thermal printer works?
Before moving further let’s learn some more about the type of thermal printer…
Types of Thermal Printers
A thermal printer basically is of two types:
1. Direct thermal printers
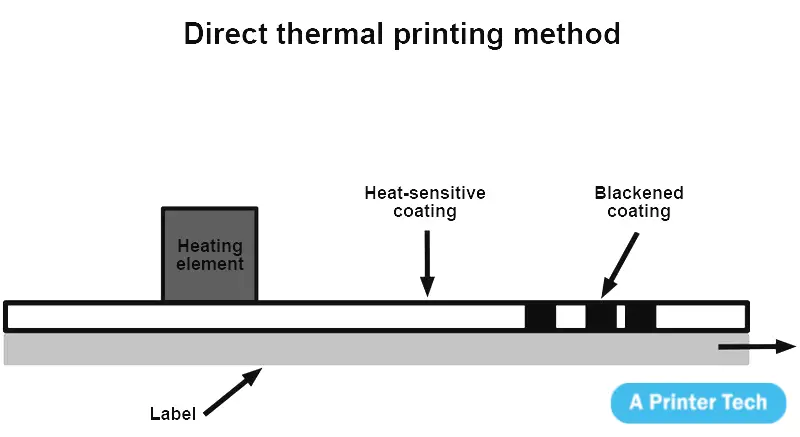
Direct thermal printers heat up the print-head to generate heat and then change the color of special heat-sensitive paper black, white, and other colors depending on the ink ribbon used with it. The paper cannot be reused as direct thermal printing technique permanently damages the paper making it unprintable. The paper has a coating of special chemicals, which are sensitive to heat generated by the direct thermal printers.
2. Thermal transfer printers
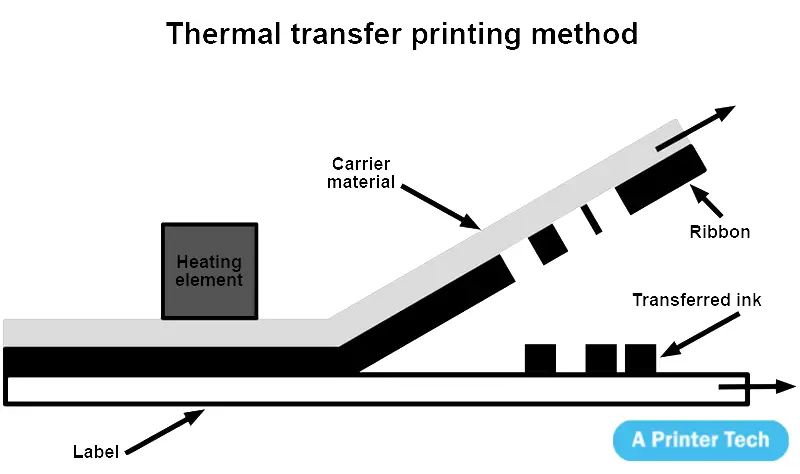
Thermal transfer printers use a wax or resin ribbon instead of an ink ribbon to print text and images on specially treated transparent film, which is not much similar to normal thermal papers but works well for this purpose. These sorts of films can be reused many times over again. Other than that, these are more expensive to buy and operate as they are not much common.
Different parts of a thermal printer:
Let’s learn what are the parts of a thermal printer before moving further.
1. Heating element
It is basically an electric coil that heats up to melt the wax on thermal transfer printers or heat up the print head to make the paper turn black on direct thermal printers.
2. Print head
It contains heating elements and controls electronics for the conductivity of current through it making them either heated up (in case of direct thermal printers) or not heated up (in case of thermal transfer printers). However, small dot matrix models can have only one line per nozzle, while other larger ones can have up to nine lines per nozzle. It is important to understand how many nozzles there are in the printhead because it is one of the factors that will affect print speed.
3. Control circuit
It is where all the electronic components are located in a printer, they control heating elements and nozzle firing sequence for example by activating or deactivating them. Usually, it’s an All-in-one chip also known as a microcontroller unit (MCU). The best thermal printers have highly programmable MCUs with onboard memory to store dot matrix character fonts, barcodes, graphics, and other special characters. You may not find these things if you only use the printer for printing labels as they are mostly used to design your own logo etc.
4. Memory
Take it as RAM of a computer, the printer has its own memory to help the microcontroller (MCU) process data and run programs. Basic printers have EEPROM or flash memory storage for storing fonts and other images, whereas advanced models come with SDRAM or DRAM also known as Random Access Memory that is much faster than the previous one allowing them to print more complex graphics at faster speeds without compromising quality.
5. Power supply
It’s a transformer using AC mains power (90V-240V) provided by an external source through wires from plug sockets into the printer where they are converted to DC power required by electronics inside the printer and then stored in the capacitors or batteries.
6. Controls
It simply consists of a power switch and maybe one or two status LEDs, which indicate if a printer is busy with current job or not and battery low-level condition etc.
7. Display
Mostly simple to understand LCD displays are used in printers to display messages for the users like “battery low” etc making them user-friendly products without any compatibility hassles. However, more advanced printers come with large touch-screens too allowing users to directly interact with them using their fingers instead of just pressing buttons to select options from the menu displayed on the screen as some of the label makers have started doing these days, but that’s definitely not recommended by us as they lack durability due to increased number of moving parts.
8. Label cutter
It’s the most uncommon part of a thermal printer, which is used to precisely cut printed labels from the end of continuous label paper rolled inside it. Not all printers have this feature and frankly speaking, not much useful for labeling purposes unless you want to print your own custom labels using your own homemade software which can be fun too. A cheap alternative to these expensive devices are rotary or spindle hole punchers that do exactly the same job as precise cutting but obviously with an increased risk of damaging surrounding components if misused or dropped!
9. Spindle
It’s a round shaft on one side where rolls of continuous labels are placed and the other side has a small hole where label rolls are hung inside the printer.
10. Label exit
Described as a gear train in the technical world that is used to transfer power from DC motor’s pinion (small gear) attached to it through gears to a rubber roller with teeth on one side which pulls the paper roll out of the printer after each completed printing job so that user can tear off printed label by pulling it manually over the cutter.
11. Base assembly
It comprises all major components like printhead, control board and etc mounted on a metal frame for durability purposes making them more robust devices while allowing easy access to service engineers during the warranty period if needed.
12. Power switch/LED indicator
Not much to talk about here, every thermal printer needs a power switch to turn it on or off and most of them have status LED indicators too that are lit while the printer is busy with current job and goes out when it’s finished!
How does this printer work?
The working mechanism of a thermal printer has four major components: the thermal head, transfer roller, platen roller, and gear assembly.
The thermal head contains two metal plates and requires no ink or ribbon because it heats up to leave an image on the paper.
The paper is wound around the transfer roller and wrapped in such a way on the platen roller.
When you send a print command, it will move the platen roller forward to press the thermal head against the paper over the full width of print.
Finally, you see that there are gears inside this printer. They make sure that everything moves as per our instructions sent via software/hardware. The data is used by the printer’s controller board which moves the hinged parts including gears using electromagnetic coils or stepping motors.
And now let’s learn what’s inside each component…
Inside it has a thermal head which is made of two metal plates. To make it work you don’t need ink or ribbon as it heats up to leave an image on the paper.
The platen roller is used to keep the printable surface in position, and the transfer roller will take the thermal image away from the printing head and lay it down on the blank part of the paper.
The gear assembly makes sure that everything moves as per our instruction sent via software/hardware. The data is used by the printer’s controller board which moves hinged parts including gears using electromagnetic coils or stepping motors…this all happens with a drop of magic 😉
Enough about how it works! Let’s now find out why do we use these types of printers?
Why to use Thermal Printers?
1. Lower maintenance cost: With fewer moving parts, these printers are more durable than dot-matrix and inkjet types.
2. Limited environmental impact: Although the technology itself has harmful byproducts like heat energy, it does not include ink cartridges or toxic chemicals like many other printer technologies do.
3. Available in both direct thermal (heat) and thermal transfer (no heat) versions: In most cases, you can find one type of printer in another version that’s why we have explained all advantages of both types!
4. A wide selection of printable materials: Thermal printing is flexible enough to use on several different kinds of packaging labels including paper, plastic sheets like polyester or polycarbonate but also on a metal or a glass surface.
5. Fast and efficient: It prints at a very high speed, it is compact in size, and can print up to 5-6 full-size page labels per minute depending on the model you choose and the resolution of the print.
6. Lower power consumption: Compared to inkjet printers, thermal printing uses very low energy so you don’t have to worry about having several spare batteries charged all the time if you decide to use it as your main printer for example while camping! 🙂
Safety measures while using a thermal printer
1. Do not touch the thermal head while running;
2. Do not peel off printouts while hot!
We hope you enjoyed and learned something new reading this article! 🙂 If so, please like it and share it with your friends to let them learn something too 😀 Thank you very much for your time and we see us next time again 😉 Bye-bye!
Read also: How much printer memory do I need?