• Skip to primary navigation
  • Skip to main content
  • Skip to primary sidebar

A Printer Tech

True Reviews on Printer

  • Home
  • Printer
  • Budget
  • Buying Guide

HP Printer Cold Reset Vs Factory Reset: 3 Key Differences!

March 7, 2023 By mfarooq012012

Many people gets confused about the cold reset and factory reset of Canon printer as they do almost the same thing. However, they are not the same and different printer problems require different resetting.

So, HP printer cold reset vs factory reset, what’s the difference?

Cold reset and factory reset both reset the printer to its original factory configuration. But unlike factory reset, cold reset erases the Jetdirect configuration as well. So, when you are facing an issue with the Jetdirect setting, you have to perform a cold reset instead of a factory reset. The procedure for cold and factory reset is also different. 

If you read the whole article, you will get an idea of how these two reset options are different. So keep reading. 

HP Printer Cold Reset Vs Factory Reset: Quick Comparison

Before diving into the in-depth discussion on the difference between HP printer cold reset vs factory reset. 

Feature 

Cold Reset

Factory Reset

Function

Reset the printer to its original setting including the Jetdirect settings. 

Reset the printer to its original factory default setting except for the Jetdirect settings. 

Purpose

When the Jetdirect settings are not working or if the printer’s configuration is corrupted. 

When the printer is having other issues like a bluescreen error. 

Procedure

The procedure is different from factory resetting and varies from model to model.

The procedure is different from cold resetting and varies based on screen type

HP Printer Cold Reset Vs Factory Reset: In-depth Comparison

Cold reset and factory reset have different functions, purposes, and procedures. This in-depth comparison between cold reset and factory reset of an HP printer will help you determine which reset you should perform. 

Function:

Factory resetting on an HP printer will restore the printer to its original factory settings. Cold resetting does the same thing. But the only difference is, unlike factory reset, the cold reset procedure resets the Jetdirect card of the HP printer. 

Jetdirect is a feature in HP printers that allows the printer to connect directly to a network. Jetdirect cards also provide advanced network security features, such as authentication and encryption, to protect the printer and the network from unauthorized access and data breaches.

Purpose:

Unlike factory resetting, you only perform the cold reset when the Jetdirect card is not working. The factory reset can be performed when any printer problem is persistent. For example, your HP printer has a blue screen error issue.

If you get a green light in the Jetdirect and the router but there’s no activity light, the Jetdirect card is faulty. In this case, try troubleshooting the Jetdirect printer server first. But if the Jetdirect problem is persistent, you have to perform a cold reset on your HP printer. 

Also, if there is any corruption in the printer’s configuration and you are unable to perform a factory reset, you need to go for a cold resetting. 

Procedure:

You have to follow different procedures for factory resetting and cold resetting the HP printer. Also, the procedures vary according to the printer model. The procedures of factory resetting and cold resetting are given below.

HP Printer Cold Reset Vs Factory Reset: Factory Reset Process

Here is the process of factory resetting most HP printer models with screens.

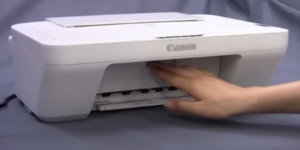
Step 1: Turn off the printer.

Step 2: Remove the power cable from the printer.

Step 3: Keep it that way for at least half a minute. 

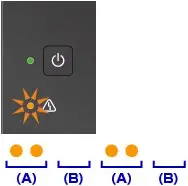
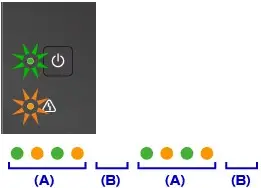
Step 4: Press the “Resume” button on your printer and keep it held as you turn On the printer. After 10 – 20 seconds, you should see the “Attention” light lit up. 

Step 5: Release the “Resume” button. The HP printer will now perform factory resetting as you see the “Attention” and “Ready” indicators cycling up. 

Here is the process of factory resetting most HP printer models without screens.

Different without-screen HP printer models require different procedures for factory resetting. Here’s a general process. 

Step 1: Turn Off your HP printer and remove the power cable. 

Step 2: Wait for 30 to 60 seconds.

Step 3: Press the printer’s power button and hold it for 5 to 10 seconds. 

Step 4: Tap the “Cancel” or “Resume” button. 

Step 5: Tap and hold the “Cancel” and “Wireless” buttons for 5 to 10 seconds. Depending on the printer’s model, in this step, you may only have to press the “Wireless” button.

Factory resetting the printer will also help you if you are facing the printer installing error 283 on windows. 

HP Printer Cold Reset Vs Factory Reset: Cold Reset Process

Cold reset procedure also varies with the printer model. Before diving into the cold resetting process, you have to remember something. 

The cold reset will entirely remove the setting of the Jetdirect card and you have to reconfigure it. That’s why to understand the configuration process, you should print the configuration page. To know how to print a JetDirect configuration page, check the printer’s manual.  

Now, let’s see the cold reset procedure of some HP printer models. 

Here is the process of cold resetting most older HP printer models with a display panel. For example, HP LaserJets 5si, 4000, 80000, and 4100.

Step 1: Turn Off the printer’s power button. 

Step 2: Press and hold the “Online” or “Go” button of the printer and turn the HP printer On. The cold reset is done. 

Here is the process of cold resetting most newer HP printer models with a display pane such as, HP LaserJets 4300, 2400, 4250, 2300, and 4350. 

Step 1: Turn Off and On the HP printer.

Step 2: When the printer’s memory count is started, tap the “Checkmark” button. And keep holding it until all the LED lights are lit up.

Checkmark

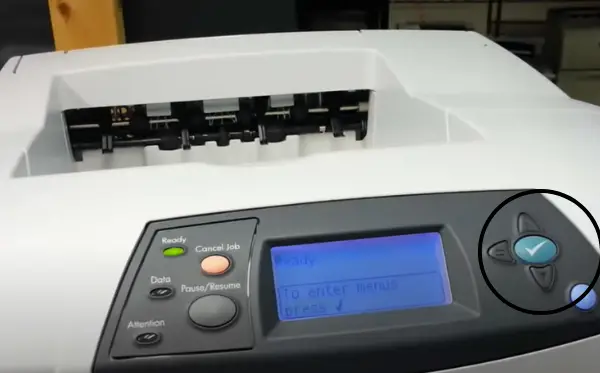
Step 3: Release the button. And locate the “Cold Reset” option by navigating the Up/Down arrow buttons. 

Step 4: Press the “Checkmark” button once again and the cold resetting will begin. 

Here is the process of cold resetting HP printer models without any display panel.

HP printers 1100, 1200, and 2200

Keep the printer On and tap and hold the “Go” button for around 5 seconds. The cold reset is done. 

Here is the process of cold resetting the HP printer with the Button LCD Control Panel. 

Step 1: Turn on your HP printer and wait until the 1/6 display appears. 

Step 2: Press the “X” or “Stop” button and you will enter the preboot menu.

Step 3: Use the  3 and 6 buttons to navigate the menu and the “ADMINISTRATOR” option

Step 4: Again, navigate and choose the “ “STARTUP” option. 

Step 5: Locate and choose the “Cold Reset” option. 

Step 6: Tap the “Home Button” and select the main menu. 

Step 7: Select “Continue”.

Here is the process of cold resetting the HP printer with the touchscreen control panel. 

Step 1: Turn on your HP printer and wait until the 1/6 display comes up. 

Step 2: Tap on the center of the touchscreen and you will enter the preboot menu. 

Step 3: Keep scrolling down and selecting “Administrator” > “Startup Options” > “Cold Reset”. 

Step 4: Go to the main menu by tapping the home button and choosing “Continue”. 

Now, you should understand the procedure difference. To find the specific instruction for your model, you can check the printer’s manual. 

FAQs: HP Printer Cold Reset Vs Factory Reset

What Is A Partial Reset In An Hp Printer?

Partial reset refers to refreshing the HP printer and getting rid of unnecessary printer memory. A partial reset resolves minor problems with your printer including a cartridge error and slow printing. 

How Long Does It Take To Reset An Hp Printer?

Depending on your printer’s model, it should take you around 30 seconds to 2 minutes. It also depends on whether you are performing a factory reset or other resets. Factory resets require more time as you have to keep the power cable off for around a minute. 

Is It OK To Reset The Printer?

It is okay to reset the printer as a last try for fixing any printer problems. It does not do anything bad to your printer. It just removes all your custom settings which you have to set again. 

Conclusion: HP Printer Cold Reset Vs Factory Reset

Here goes the whole discussion on HP printer cold reset vs factory reset. I hope now you have a clear idea about the difference between these reset options. 

If you are following some fixing instructions for your printer, make sure to perform the exact resetting option mentioned in the guide. 

That’s all for now. All the best with your HP printer and have a great day!

Filed Under: Printer

Canon Printer Triangle With Lightning Bolt Flashing: Fixed!

March 7, 2023 By mfarooq012012

If your printer detects a certain error, it will stop printing and notify you by flashing the triangle warning sign. The flashes will be different in color and number to specify certain problems with the printer. 

So, how to fix the canon printer triangle with lightning bolt flashing problem? 

To fix the Canon printer’s triangle with a lightning bolt flashing warning sign, first, you should check the fine and ink cartridge. Make sure to use the right cartridges and install them correctly. Make sure the output cover is open before printing. Always use compatible paper with the printer and before printing, set the right paper size.

There are specific fixes based on the warning light color and number of flashes. To know them all, keep reading. 

What Does a Flashing Triangle Mean On Canon Printer?

The triangle light flashing on the Canon printer is an alarm warning. It indicates a problem with the printer or its relative parts. Triangle light flashing can be of two types.

First, the light can be only orange in color. In this type of flashing, the orange light flashes 2,3,4, or more times and then goes off, depending on the problem. Then again flashes in the same way.

type of flashing

Here, the “A” and “B” is the time span, and in the “A”, the light flashes (for this example, 2 times). And in the “B,” the light goes off. 

Another type of light flashing warning has two colors in it, orange and green. Here, the colors flash alternatively.

In the “A” time span, the green and orange flash alternately, and in the “B” phase, the lights go off. 

We will discuss all the reasons and solutions for these flashes in detail in the next segment. 

Why Is The Triangle Light Orange Flashing On My Canon Printer? Canon Printer Triangle With Lightning Bolt Flashing

The different number of orange light flashing means different things. Here are the reasons for flashing orange light and all the flashes and their solutions. 

2 Flashes:

Lightning bolt symbol. You will see the orange light flashing 2 times in your Canon printer when the printer runs out of paper. Also, if the paper size is in the print setting and the size of the paper you are using doesn’t match, you will see 2 flashes. 

Solution: 

  • Check the paper tray and put the paper on the tray if necessary. 
  • When inserting the paper into the paper tray, make sure the paper’s front edge touches the back end of the tray. 
  • While printing, go to the “More settings” and check the paper size. Make sure to put the exact paper size you are using for printing.

3 Flashes:

The orange light will flash three times if somehow the paper gets jammed in the paper output slot or near the transport unit. Also, if the output tray of the printer is closed during printing this warning will show up. 

Canon Printer Triangle With Lightning Bolt Flashing. Solution:

  • Check and make sure the output tray cover is open. 
  • Check the output slot. If the paper is jammed there, use both hands to hold the paper and slowly pull it towards you. If you face this issue while printing, press the “stop” button to stop the printing task and pull the paper out. 
  • If the paper is not in the output slot, you have to check the transport unit and if needed, remove the paper from there. Here’s what you need to do. 

Step 1: Turn off your Canon printer and remove the power cable. Close the document cover. 

Step 2: Tilt the machine towards its right.

Step 3: Open the transport unit of the printer by pushing the open lever. Make sure to hold the machine properly so it doesn’t fall over. 

Step 4: Carefully pull out the jammed paper from the transport unit.

Step 5: Close the transport unit and place the machine properly.

Step 6: Load papers and try running the printer.

Load papers

Apart from the paper jam, the printer can get jammed for many other reasons. For efficient performance of the printer, you should fix the printer jam if you detect any. 

Canon Printer Triangle With Lightning Bolt Flashing. 4 Flashes:

If the printer’s fine cartridge is installed incorrectly, 4 orange flashes will show up near the triangle with a lightning bolt flashing. 

Solution: 

Here’s how to solve this issue. 

Step 1: Open your printer output cover. 

Step 2: ensure the correct installation of the fine cartridges by pushing up the lock lever of the ink cartridges. 

Step 3: You can take out the fine cartridges from the printer and reinstall them to be extra sure.

Step 4: Close the output cover. And the flashing light should be gone. 

5 Flashes:

5 flashes warning also indicated a problem with the fine cartridges. If the fine cartridges are not installed or recognized by the printer, this issue can happen. Also, using the wrong type of ink cartridge causes this problem as well. 

Solution: 

  • Check the slot, and if there is no fine cartridge, install one. 
  • If your printer has fine cartridges but you are still getting this light, the cartridge might be damaged and you need to replace it. 
  • Make sure to use compatible cartridges for your printer only. The right type of cartridge is mentioned in your printer’s manual. 

Canon Printer Triangle With Lightning Bolt Flashing. 6 Flashes:

If your printer’s paper cover is kept open or if the fine cartridge is installed in the wrong position, you’ll notice 6 flashes. 

Solution: 

  • Make sure the paper cover is closed before printing. 
  • Check all the fine cartridges and make sure they are placed in their proper slot. 

8 Flashes:

When the ink absorber of your Canon printer is almost full, the printer will indicate it with flashing 8 flashes. 

Solution: 

  • If you are in the middle of important printing, tap on the printer’s “Color” or “Black” button to resume printing for now. 
  • Consult the printer’s dealer as soon as possible and have the printer repaired. 

Canon Printer Triangle With Lightning Bolt Flashing. 9 Flashes:

If you forget to remove the protective tape from the fine cartridge holder, the printer will flash orange light 9 times. 

Solution: 

Open your Canon printer’s output cover. And then remove the protective tape from the holder of the fine cartridge. 

10 Flashes:

10 light will flash when you are printing on both sides and the paper you are using is not compatible with this type of printing. 

Solution: 

Check the printer’s manual and make sure to use the right type of paper for automatic duplex printing. Usually, A4 size and letter size paper are compatible with this type of printing on most printers. 

11 Flashes:

If the page size setting and the size of the paper you are using don’t match, the printer can show 11 flashes. Also, due to a clogged print head nozzle, the automatic print head alignment can fail. And the printer can indicate this warning sign. 

Solution: 

  • Make sure to input the right paper size while printing. 
  • If this doesn’t solve the problem, you have to clean the printhead of your Canon printer. 

Also, remember to clean your printer regularly to make it last longer. 

12 Flashes:

If your Canon printer is unable to print the data you are trying to print, it can flash 12 orange lights. For example, Creative Park Premium content. 

Solution: 

  • Make sure you use only the cartridges compatible with the Canon printer. 
  • Check and make sure the fine cartridges are installed correctly and it has all the colors. 

13 Flashes:

If your Canon printer’s ink has run out, you will notice 13 orange lights flashing. 

Solution: 

  • If you are in the middle of important printing, press the printer’s stop button at least 5 times. Then try printing. If your printer’s cartridges have any remaining ink left, you will be able to print some more pages. 

But note that, the quality won’t be top-notch. Also, this process may damage the printer so do it at your own risk. Canon won’t take any responsibility if your printer breaks during this procedure. 

  • Remove the old cartridges and replace them with new and genuine Canon ink cartridges. 

Canon Printer Triangle With Lightning Bolt Flashing. 14 Flashes:

Sometimes, the Canon printer can be unable to recognize the ink cartridges. In this case, you will notice the orange light flashing 14 times. 

Solution: 

  • Use only ink cartridge that are compatible with your Canon printer. 
  • Make sure the ink cartridges are installed correctly. 

15 Flashes:

If your printer can not verify the fine cartridges, it can show 15 flashes sometimes. There is a high chance that the fine cartridges in your printer are damaged.

Solution: 

You have to replace the fine cartridges. If replacing the fin cartridges doesn’t solve the issue, you have to consult with your dealer and have the printer repaired. 

16 Flashes:

If your Canon printer Ink has fully run out, you will notice 16 orange flashes. 

Solution: 

  • You can try pressing the printer’s “Stop” button 5 times and then try printing. There might be some residual ink. But there’s a high chance it won’t work. 
  • Change the ink and try printing again. 

21 Flashes:

If the Canon printer fails to detect the width of the paper you are using, it can show 21 orange flashes.  

Solution:

  • Press the “Stop” button to stop the current printing job. And then try printing again. 
  • If retrying doesn’t work, you have to disable the width recognition feature of the printer. Here’s how you do it. 

Step 1: Open your printer driver from your computer. 

Step 2: Select “Maintenance” located at the top of the screen. 

Step 3: Select “Custom Settings”.

Custom Settings

Step 4:  Uncheck the “Detect paper width” option by clicking on the tick box. Click “OK”. 

Now you should be able to print. 

22 Flashes:

If the paper is not being fed in the right alignment, the printer will detect that and will show 22 flashes. 

Solution: 

Remove the paper stack from the tray and load the paper on the tray again. Make sure this time the paper is not aligned on one side. 

Why Is The Triangle Light Orange & Green Flashing On My Canon Printer?

Sometimes, instead of only flashing orange light, your Canon light can flash orange and green light alternatively. The flashing number can be 2, 7, 9, or any other number. 

In this case, the printer error is more serious and you have to take the printer to the dealer to have it fixed. Before going to the dealer, you can try unplugging the printer and plugging it back. 

FAQs:  Canon Printer Triangle With Lightning Bolt Flashing

How Do I Clear The Ink Error On My Canon Printer?

To clear the ink error on your canon printer Press the “Resume” or “Cancel” button on your Canon printer. Hold it for at least 5 seconds and release it. The printer should start initializing and the ink error warning sign should be gone. 

What Does The Red Light On The Canon Printer Mean?

The red light on your Canon printer means it does not have enough paper to print. You have to load papers. Also, if the papers are not placed properly on the paper tray, the printer may not recognize them and show red light. Make sure to push the paper all the way into the tray. 

Conclusion: Canon Printer Triangle With Lightning Bolt Flashing


Here goes all the fixes for the canon printer triangle with lightning bolt flashing problem. Carefully notice how many times your printer flashes the light and act according to it. 

That is all I had to say for now. All the best and goodbye!

Read also: HP Printer Blue Screen Error

Filed Under: Printer

HP Printer Blue Screen Error: All The Fixes!

March 7, 2023 By mfarooq012012

HP printers showing a blue screen and stopping all printing activity is a common issue faced by HP printer users. Sometimes you can only see the blue screen and sometimes it can show some error codes on the blue screen. 

So, how to fix the HP printer blue screen error?

To fix the HP printer blue screen error the first thing you need to do is check the physical connections & settings and reset the printer. Updating the printer’s driver, firmware, and router’s firmware can also solve this problem. Different error codes require specific solutions including restoring the registry, updating the time, and factory resetting the printer. 

Keep reading the article and know all the methods of solving this problem with proper guidelines. 

Hp Printer Blue Screen Error: General Fixes

If your HP printer doesn’t show any particular code, just the blue screen, try the following methods one by one until the problem is solved. 

Method 1: Check Physical Settings

Before diving into the other methods, you should check the physical settings first. Check the following things. 

  • If your printer is connected via a USB cable, make sure the connection is secure. Both on the printer and power cord. HP suggests plugging the power cable directly into the outlet. 
  • If your printer is connected wirelessly, make sure it is connected to the correct network.
  • Check the printer’s output tray to make sure there is no paper jam.
  • Check if the cartridges are installed properly. 

Method 2: Reset The printer

Resetting the printer will mostly solve the blue screen error in the HP printer. Resetting fixes many internal issues of the printer. Moreover, printer overheating can cause it to show a blue screen which can be solved by power resetting as well. 

Here is how to reset the printer.

Step 1: While leaving the printer switched On, unplug the power cable. 

Step 2: Keep the printer like that for a minute. 

Step 3: Put the power cable back on the printer.

Step 4: Turn on your HP printer. 

Now the printer is done resetting. See if the blue screen is gone. If not, move on to the next method. 

Method 3: Install the Latest Printer Driver

If your printer’s driver is outdated, you can get the blue screen error. Follow the steps listed below to install the latest printer driver. 

Step 1: Launch any browser from your PC.

Step 2: Go to the HP support Website. 

Step 3: Click on the “Software and Driver” option.

Software and Driver

Step 4: Select “Printer” and enter your printer’s model in the text bar. And hit “Submit”.

Submit

Step 5: Choose the OS of your computer and download the most recent version of the driver. 

Step 6: Open the downloads file and follow the instructions to install the driver. 

Method 4: Update the Router Firmware

If your router’s firmware is outdated, it can cause connectivity issues between the printer and your computer. This is why you might experiencing the blue screen error. Here’s how to update the router’s firmware. 

Step 1: Open any browser on your computer. 

Step 2: Go to the official website of your router.

Step 3: Enter the password and username of your network to log in to your account. 

Step 4: Go to “Options” and then select “Settings”.

Step 5: Click on “Advance and Administration”.

Step 6: Click on “Router Update” and hit check. 

Step 7: The update option will show up. You should select the “Yes” or “Update” button. 

Step 8: The firmware will automatically be updated. You may need to click “Yes” or “Apply” for confirmation. 

Method 5: Try Using USB 2.0 Port

If you are using a printer USB in a 3.0 port for connecting the printer, you may face this Blue Screen error. This problem usually happens in Windows 7. Here’s what you have to do. 

Step 1: Remove the USB plug of the printer from your computer. 

Step 2: Restart the computer. 

Step 3: Locate a USB 2.0 port in your computer and plug in the cable there. 

Now try printing something and see if the blue screen error is gone. 

HP printer blue screen error: Code Specific Fixes

Sometimes, instead of just a blue screen, you can get an error code as well. Here are some different blue screen errors with their fixes.

Error Codes

Fixes

Error 00829c98

Remove the cartridge and reset the printer

Error c4eba341

Reset the driver

Restore the registry file

Uninstall & Reinstall the driver

Error b305ed09

Reset the printer

Update the firmware

Error b82f6174

Fix printer time

Factory reset the printer

Error b305a901

Update the firmware

Error 04358a98

Contact the dealer

Fixes Of HP Printer Blue Screen Error 00829c98

HP printers can show Error 00829c98 on the blue screen due to some software or firmware issue. To clear this error code you have to remove the printer’s cartridges and reset the printer. Do it in the following way. 

Step 1: Turn the printer on. 

Step 2: Wait and let the printer go into idle mode before going to the next step. 

Step 3: If your printer is connected to the computer through a USB cable, remove the cable. If your printer is connected wirelessly, leave it that way.

Step 4: Take out the printer’s cartridges. 

Step 5: Now follow the process of resetting the printer that I mentioned earlier.

Step 6: After resetting, turn the printer on and again wait till the printer goes into idle mode. 

Step 7: Reinstall the cartridges. 

Step 8: You may get a calibration printing prompt. Allow for a calibration print. 

Step 9: Reconnect if any USB cables were removed and check if the printer works. 

Fixes Of HP Printer Blue Screen Error c4eba341 

Error c4eba341 in your HP printer indicates a malfunction in the printer spooler or corruption in the registry. Moreover, if your printer driver is installed incorrectly, the printer can show this error code. You have to try three methods one by one to fix this error. 

Method 1: Resetting The Printer

Resetting the printer might resolve the malfunction in the spooler. So, reset the printer following the steps of resetting the printer mentioned above.

Method 2: Restoring Registry File

If resetting the printer doesn’t work, restore the registry file in the following way. 

Step 1: Press the Windows key + R on your keyboard and the Run dialog box will come up.

Step 2: Type “regedit” in the dialogue box and after that, click “OK”. This will open the Registry Editor.

Step 3: Locate the “mscvcp90d.dll” file in the registry. If you don’t find it here, open the recycle bin and search for the file there. 

Step 4: After locating the file right-click on it and select “Restore”. 

Step 5: Restart the computer once the “mscvcp90d.dll” file is restored. 

If this method doesn’t work, the driver might be installed inappropriately. So, try the next method. 

Method 3: Uninstalling & Reinstalling Driver

Here’s how to install and reinstall the driver. 

Step 1: Open the HP folder on your computer. 

Step 2: Locate your printer’s name or model from this folder. 

Step 3: Click on the printer and select “Uninstall”.

Step 4: Hit “Next”.

Step 5: After finishing the uninstalling process, download and install the latest printer drive following the steps mentioned above. 

Now the error c4eba341 code should be gone. If you ever face a validation failure in an HP printer, this method can resolve that issue as well. 

Fixes Of HP Printer Blue Screen Error b305ed09:

The error b305ed09 occurs due to the printer’s firmware issue or other problems with the printer software. There are two methods to resolve this error. Try them one by one.

Method 1: Reset The Printer

Resetting the printer should solve this error. If resetting the printer doesn’t help, then move on to the next method.

Method 2: Update The Firmware

You can update the firmware of the printer from your HP printer’s control panel. Here’s how to update the printer firmware. 

Step 1: Make sure the printer is connected to the internet. And remember not to turn off the printer until the update is completely done. 

Step 2: From your HP printer’s control panel click on the “Settings, Setup” or “Service” menu depending on your printer’s model. 

Step 3: Tap on the “Tools” or “Printer Maintenance” option.

Step 4: Choose the “Printer Update” option. Depending on the model, it can be named “Web Services” or “ LaserJet Update”.

Step 5: Choose the “Check for Update” option. 

Step 6: Instruct the control panel to update the firmware and keep tapping “yes” if any confirmation message appears. 

Fixes Of HP Printer Blue Screen Error b82f6174:

Error b82f6174 in HP printers usually occurs due to incorrect time setting of the printer. Sometimes, due to other incorrect settings, you can face this problem as well. Follow the two methods given below one-by-one and the error should be fixed. 

Method 1: Fix Time

Check if your printer’s time is correct. If not, you have to set the time in your HP printer and match it to your current region. The time-fixing process can vary depending on the printer’s model. 

Method 2: Factory Reset

If fixing the time doesn’t fix the b82f6174 error, you have to factory reset the printer. To factory reset your HP printer, follow the process given below. 

Step 1: Tap on your HP printer’s gear icon to go to the setup option. 

Step 2: Tap on the “Printer Maintenance” option. 

Step 3: Select “Restore”. 

Step 4: Select the “Restore Factory Defaults” option. 

Step 5: Select “Continue”.

Here’s a note, the cold and factory reset of the HP printer are different things. So you should follow the procedure of factory resetting not. 

Fixes Of HP Printer Blue Screen Error b305a901

This error also occurs due to outdated firmware. You have to update the printer’s firmware as mentioned above.

Fixes Of HP Printer Blue Screen Error 04358a98 

To fix the Blue screen error 04358a98, you can try different troubleshooting methods and check if that helps. However, mostly this error occurs due to hardware problems and requires a professional to handle this problem. So it’s better if you contact your printer’s dealer. 

If nothing of these solutions work try to contact HP support and they will help with the issue you’ve 

FAQs: HP Printer Blue Screen Error

How To Avoid Printer From Overheating?

To avoid overheating the printer you should stop playing video games on the computer while printing. If you have different tabs open, you should close them while printing to avoid overheating. If your computer or phone space is almost full, try to free up some space and try printing again. 

Why is my HP printer blinking blue?

The HP printer blinking blue means it lost the internet connection. Keep the printer within your router’s range and check if the router is turned on. If it doesn’t work, you have to reset the printer and the router and then you have to reconnect them. 

Why Is My Hp Printer Printing Blue Streaks?

Your HP printer printing blue streaks indicate the toner or ink of your printer is over. You have to refill the toner or ink. If the ink is refilled but you are still facing the blue streaks problem, the cartridge may be installed wrong so take the cartridge away and install it correctly. 

Read also: How to fix printer jam

Conclusion: HP Printer Blue Screen Error 

I hope now you are not feeling blue anymore as you could solve the HP printer blue screen error. Try the methods described in this article with patience and you should easily be able to get rid of the error codes. 

That’s all for now. Enjoy your day!

Filed Under: Printer

Why Is My Printer Printing Off Center? 8 Reasons and Solution

March 7, 2023 By mfarooq012012

Sometimes, even if your document including PDF, image, or Word file is properly aligned, the printer can still print off-center. Correcting the document alignment won’t solve this problem either. 

So, why is my printer printing off-center?

The printer will print off-center if you use the wrong paper size or if the paper size setting is wrong. Use the recommended paper size and adjust the paper size setting on your PC. Stuck paper in the printer and clogged cartridges can be the culprit too. You also need to adjust software calibration and printer & paper formatting to get rid of this off-centered issue. 

Don’t go yet. This article will describe the solutions to all the possible reasons for this problem. So, keep reading! 

Why is My Printer Printing Off-Center?

Your printer can print off-center for many reasons including the wrong paper size, printer software miscalibration, and wrong cartridges. Let’s discuss all the reasons in detail. 

Reason 1: Wrong Paper Size

Using paper sizes that are not compatible with your printer is a common reason for the print to go off-center. 

Solution: 

Use the correct size of paper in the printer. Usually, all the printers are compatible with some common paper sizes. For example, letter paper (8.5 × 11 inches), Tabloid (11 × 17 inches), A4 paper (8.27 x 11.69 inches), and Legal paper (8.5 × 14 inches). 

Check your user manual to find out the compatible paper sizes that you can use in your printer. 

Reason 2: Wrong Paper Size Setting

Even after using the correct size of the paper, due to the wrong paper size setting in the printer, it can print off-center. 

Solution: 

You have to change the paper size on your computer. Here’s how to do it. 

Changing default paper size in Windows 10:

Step 1: Press the Windows icon on your keyboard or go to the start menu. 

Step 2: Type “Printer” on the search bar and go to the printer’s menu.

Step 3: Right-click on the printer you are working with and select “Properties”. 

Step 4: Select “Paper Tab” and choose the paper size you are using. If your paper size is not on the list, select “Custom” and manually add the paper size. 

Step 5: Click “OK”. 

Changing default paper size on Mac:

Step 1: Click on the Apple menu and go to “System Preference”. 

Step 2: Select “Printers & Scanners” 

Step 3: Click on the “Default Paper Size” arrow and choose the paper size you are using.

Default Paper Size

Step 4: If you can’t find the right paper size in the list, select “custom” and input your paper size.

Now do a test print and check if the print is aligned. 

Reason 3: Stuck Paper in the Printer

Paper getting stuck in the printer is a common and annoying problem. When you print on a jammed printer, the stuck paper causes the new paper to shift from its correct printing path. As a result, the print is off-centered.

Solution: 

You have to check and clear the jammed printer. Follow the steps given below. 

Step 1: Turn off your printer before starting the process. Also, unplug it. 

Step 2: Remove all the paper from the paper tray. And check if any paper is stuck here. Hold the paper with both hands. Gently pull the stuck paper out. If there is no stuck paper in the tray, proceed to the next step. 

Step 3: Open the printer cover or scanning unit and check if any paper is stuck under the printer holder. 

Step 4: Shift the printer holder to the left or right to expose the paper depending on where the paper is stuck. 

Step 5: Hold the stuck paper with both hands. If you pull the paper with one hand, you might tear it. Now carefully pull out the paper at 45 degrees angle. Make sure no bit is left in the printer.

Step 5

Step 6: Adjust the printer holder and reinstall the cover. Now the printer is cleared. 

Reason 4: Dirty or Clogged Cartridges 

Dirty Cartridges cause the ink to bloat or streak around which can make the prints on the page look off-centered. Dirty cartridges can also leave roller marks on your paper. 

Solution:

You have to take out the cartridges and clean them properly. Here is the process of cleaning the printer cartridges. 

Tools required:

  • Dry Soft cotton cloth
  • Cotton buds
  • Lukewarm water

Process:

Step 1: Turn the printer off. Remove the power cable from the printer.

Step 2: Locate the cartridges in your printer. Usually, they are found in the front of the printer in a cage with a flap-openable cover.

Clogged Cartridges

Check your printer’s manual for the exact location of the cartridges. 

Step 3: Flap open the cover and take out the cartridges. 

Step 4: Take a dry soft cloth and wipe the outside of the cartridges. 

Step 5: Wet a cotton bud in lukewarm water and gently wipe the print head with it. 

Step 6: Take another wet cotton bud and carefully wipe the colored circuitry. 

Step 7: Let the cartridge dry completely before putting it back into the cartridge case.

Reason 5: Wrong-sized cartridges 

If you have recently changed the cartridge and the problem has been happening since then, you might have installed the wrong-sized cartridges. 

Solution: 

You should always buy cartridges with the Printer’s recommended size. You can acquire the cartridge size recommendation from three sources. 

  1. Your printer’s owner’s manual should have the size numbers that are compatible with the printer.
  2. If you don’t have the owner’s manual, you can visit the official website of your printer’s brand and find out what size cartridge you need. 
  3. Some printers like HP provide a cartridge size card along with the printer for your convenience. 

Also, don’t forget to install the cartridge correctly. 

Reason 6: Printer Software Miscalibration 

Sometimes, due to the printer’s software miscalibration, it can print off-center. 

Solution:

You have to calibrate the printer from its software. Here’s how you do it.

Step 1: Open the printer’s software. 

Step 2: Click on the “Maintenance” option and select tools/Utilities. 

Step 3: Click on the “Alignment/Calibrate Printer”. 

Step 4: Complete the alignment process by following the wizard’s instructions. Select “Finish” once the process is done.

Reason 7: Wrong Printer & Paper Formatting 

If you are facing the off-center issue from a Mac, the formatting might be set to “Any PC” rather than your PC. Due to this formatting, the print can be off-centered by around 3/8″ (10mm).

Solution: 

Step 1: To set the correct formatting, follow the steps below. 

Step 2: Go to any document you want to print

Step 3: From the top left corner of your screen, click on “File”. 

Step 4: Select “Page Setup”.

Page Setup

Step 5: You will see an option “Format for” and it is set to “Any Printer”. Click on the arrow and change the format to “My Printer”. Now you should be able to print in the center. 

Reason 8: Misaligned Roll of labels

If you are printing labels, sometimes you can face this issue if the roll of the label is misaligned. 

Solution: 

There is nothing you can do about it as this is a manufacturing fault. Change the roll and try again. Use the faulty roll of the label for less important printing. 

These are the solutions to the off-center problem. If the problem is still persistent, or you are not comfortable fixing it yourself, you should consult a professional. Also, don’t forget to clean your printer regularly to make it function longer. 

Frequently Asked Questions (FAQs):

How do I fix uneven printing?

To fix uneven printing, you have to use the recommended paper size and type, do a system calibration, and make sure the cartridge is clean. You also have to ensure the cartridge is properly installed, also, from the printer driver, deactivate the “improve Grey Color” mode. 

Why is my printer crooked?

The printer will pull paper in crooked if you use the wrong type of paper in the printer. If the paper is thicker or thinner than the printer’s capacity, this problem can happen. Moreover, putting too many or too few amounts of paper in the paper tray can cause this issue. 

Why is my printer printing blank pages?

The most common reason behind the printer printing blank page is empty ink cartridges. Refilling the cartridge should solve this problem. Also, clogged or dirty cartridges and incompatible cartridges can cause this problem. 

Conclusion 

Now you should get the answer to your question “why is my printer printing off-center”. I hope the problem is solved now. Never forget to do a test print before printing a bulk amount of documents. It will save both your time and paper. 

That’s all for now. All the best and goodbye!

Filed Under: Printer

Unable To Verify Printer On Your Network: 6 Easy Fix

March 7, 2023 By mfarooq012012

No matter if you are using a printer for the first or the 100th time, your Mac can still fail to verify the printer on your network. 

So, what to do if your Mac is unable to verify the printer on your network?

If your Mac is unable to verify the printer on your networks, check the internet connection first and try manually connecting the printer. Removing the extra device and print queue can resolve this problem as well. Confirm that the printer driver is up to date. If none of them work, you should factory reset the printer’s settings. 

All the methods of solving this issue are described in this article comprehensively. So, keep reading and find out. 

What to Do If Mac is Unable to Verify the Printer on Your Network? 

There are several methods to fix the network verification problem of the printer on your Mac. You have to try out those methods one by one until you get it fixed. Let’s discuss these methods. 

Method 1: Basic Troubleshooting to Fix Unable to Verify the Printer  

In the beginning, you have to do some basic troubleshooting to rule out the common reasons behind this problem. 

Step 1: Checking the Cable Connections 

Check if the power cables are rightly connected to the printer. To be extra sure, remove the cable and put them back in. Also, look for visible damages in the cable. 

The cable is prone to wear out with time and the worn can be internal. Try connecting another cable to the printer and check if the problem is lingering. If the new cable solves the problem then the cable was faulty. Otherwise, go to the next step. 

Step 2: Turning On and Off the Devices

It might sound silly, but most of the time, turning the devices off and on solved the problem. As the device is rebooted, it solves some underlying problems and starts to work fine. 

Shut down both your Mac and the printer. Turn them On again and see if your PC can verify the printer now. 

Step 3: Check the Network

If your printer is connected to your WIFI, Make sure the router is on and the internet connection is in good condition. Also, make sure the printer and your PC are within the network range. 

Check if your Mac and the printer are connected to the network. You have to link the printer to the Wi-Fi as the way shown below. 

Connecting HP printer to Wi-Fi:

  1. Press the setup button and then press the wireless setting or network button. There should be a sign like this (). 
  2. Tap on the “Wireless Setup Wizard” option. 
  3. Feed your network’s name and password, and you are done. 

Sometimes, the Mac address filtering can block the HP printer from connecting. Resolve the filtering issue and try to connect again. 

Connecting Epson printer to Wi-Fi:

  1. Select the “Home” button from the control panel of your Epson printer. 
  2. Choose the “Wi-Fi setup” option and press “OK”
  3. The setup wizard will appear with another “Ok” pop-up button. Select it. 
  4. Select your network’s name and enter the password. A “Setup Complete” text will show up on the screen. 

Connecting Canon printer to Wi-Fi:

  1. Press the “Home” button on your printer’s touchscreen. 
  2. Press the Wi-Fi button and hold it until the “LAN Wireless setup” option comes up.
  3. Press the button and press OK. 
  4. Select the network you want to add and feed the password. Press OK. 
  5. You will notice the Wi-Fi light and power light stopped flashing. That indicates the network is connected. 

Step 4: Add the Printer Manually. 

Sometimes, you may miss the proper setup of the printer on your MAC. Due to this, your Macbook Pro or Macbook Air might not be able to verify the printer on your network. 

Follow the steps given below to set up the printer on your Mac properly. 

  • Click on the Apple® menu located at the top-right corner of your computer’s monitor
  • Click on the “System Preferences” option and select “Printers & Scanners”

Printers & Scanners

  • Click on the + icon to add the printer. 
  • You can add the printer in 3 different ways.
    First, by default, the printer’s name will appear on your Mac screen. Click on the name of the printer.

Click on the name of the printer

If the printer’s name doesn’t come up, you can find out the IP address of your printer and add it to the list.

printer’s name doesn’t come up

If you can’t find out the IP address, you have another option. If your computer’s file-sharing option is open with Windows PCs, you can find out the printer that is also shared by those Windows PC. for this, you have to select the third option shown below.

IP address

  • In the “use” field, select the driver or the software of your printer and click “Add”. 

Step 5: Removing And Re-Adding the Printer

If the printer is already added to your Macbook but your Mac still can’t verify it, you should remove the printer from the list. And then re-add the printer. 

To remove and re-add the printer, follow these steps: 

Step 1: Go to the “Printers & Scanners” from the System Preference. 

Step 2: Select the printer you are trying to remove from the left-side menu. 

Step 3: Select the (-) option and the printer will be removed.

printer will be removed

Step 4: Turn the power off of your printer. And if the printer and your computer are connected via a cable, disconnect that as well. 

Step 5: Reconnect the cable and turn On the printer. The printer should be automatically added to your computer’s list. If not, add it manually. 

If this doesn’t work, proceed to the next method.

Method 2: Removing Extra Devices

If there are multiple printers connected to the computer at once, it can affect the connectivity of the printer you need right now. To do this –

  1. Go to “Printers & Scanners” and check if there are multiple printers added. 
  2. Select each of the printers. And from the left tab, click on the (-) sign to remove those printers. Keep the only printer you need to connect to right now. 

Now, your PC should be able to verify that specific printer. If your PC is still unable to do so, go to the next method. 

Method 3: Clearing the Print Queue

If the verifying printer problem starts after you have used the printer for a while, there can be a print queue. The out-of-control queue makes your Mac to be unresponsive to the printer and not able to verify the printer on the network. 

Here’s how to check if there is a print queue. 

Step 1: Go to the Printers and Scanner from the system preference.

Step 2: From the left tab, choose the printer you are facing a problem with. 

Step 3: From the right tab, select the “Open Print Queue” option.

Open Print Queue

Step 4: Now, you will see all the instructions that are queued for that printer. 

If there are too many tasks lined up, you have to clear them up manually. For that, click on the individual tasks and a little cross (x) button will show up. Click on that cross button to delete the task.

Step 5: Sometimes, you may find some tasks to be paused. Insufficient memory to print a particular file can keep the printing task paused. This paused task can also create a queue problem. Click on those tasks, if important, select “Start or “Resume”. Otherwise, delete them. 

Now check if the network problem is solved. 

Method 4: Updating Printer Driver

If the printer’s driver of your Mac is outdated, your PC will be unable to verify the printer on your network. So you must update the driver of the printer in the following way. 

Step 1: Go to the “Managed Software Center” on your PC. 

Step 2: If your printer’s driver needs an update, you will see the available update in the list. 

Step 3: Click on the “Update All” option in the printer update.

Update All

Step 4: keep following the instruction and click “Ok” or “Accept” as required until the update is finished. 

You can manually update the driver as well in the following way. 

Step 1: Go to the printer’s brand official website. Select your printer’s model name and look for the driver. 

Step 2: Download the driver for your Mac. 

Step 3: Double-click on the downloaded driver file and follow the pop-up instructions to update the drive. 

Method 5: Advanced Setting

In this method, you have to feed the URL of your printer to the advanced option on your Mac. For this method, you have to find out your printer’s URL first. Then, follow the steps described below. 

Step 1: Go to the Printers and Scanners menu.

Step 2: On the printer’s panel, you will see a (+) icon on the lower-left side. Click on that button. 

Step 3: Click on the gear icon or which is the “Advanced” feature. 

Step 4: If you don’t find the “Advanced Button” on the screen, right-click on the top panel (near the Fax, IP, Windows icon). From the search bar, select “Customized Toolbar”. You will now see the “Advanced” button here. Click and hold the button and drag it to the toolbar. And click “Done”.

Step 5: Once you select the advanced option, on the right tab, you will find the “Internet Printing Protocol” button. Select the button. 

Step 6: In the “Type” bar, enter the URL of your printer. Click OK and the process is done. 

Method 6: Factory Reset the Printer

If none of the methods explained above work, try resetting the printer system from your Mac. It will delete all the data about previous printers and all the previous printers’ presets. Here’s how you have to do it. 

Step 1: Select “Printers & Scanners” from the System Preferences.

Printers & Scanners

Step 2: Right-click on the “printer” option on the screen. 

Step 3: Select the “Reset Printing System”. Select OK if any confirmation message pops up. 

Step 4: Now the system is reset and the printer list will be empty. 

Step 5: Re-add the printer you want to connect by clicking the + option. 

Now your PC should be able to verify the printer. 

Frequently Asked Questions (FAQs):

How do I add a network printer to all computers?

If you connect the network printer to the Wi-Fi, all the computers should automatically recognize the printer. You have to go to the Printers and Scanners setting of your computer and add the printer from the nearby printer’s list. 

Are all printers compatible with Mac?

Yes, all modern printers are compatible with Mac. but you have to install the updated driver to let your PC verify the printer. The network printers will automatically be recognized by Mac. However, for a cable printer, you must use a Type – C cable to connect the printer to the PC. 

Why is my printer connected but not printing?

If your printer is connected to the PC but still not printing, some paper in your printer might be stuck. Printer queues, outdated drives, and poor networks can also cause this issue. You should also check if there is enough ink on the printer. 

Conclusion 

Here’s everything you had to know, unable to verify the printer on your network. Try all the methods one by one and hopefully the printer verifying problem will be fixed. If you still can’t solve the problem, you should consult a professional. 

That’s all for now. Best of luck with the printer, and have a nice day!

Filed Under: Printer

  • « Go to Previous Page
  • Go to page 1
  • Go to page 2
  • Go to page 3
  • Go to page 4
  • Go to page 5
  • Go to page 6
  • Interim pages omitted …
  • Go to page 8
  • Go to Next Page »

Search

About US

Welcome to A Printer Tech! We are a team of passionate individuals who believe that printing should be easy, convenient, and affordable for everyone. Our mission is to provide high-quality printing services that meet the unique needs of our customers, whether they are individuals, businesses, or organizations.. Read more about us.

Categories

DMCA.com Protection Status

Most Popular

  • Why is my Canon printer printing blank pages: your best guide
  • Solving Windows cannot connect to the printer access is denied error
  • How to reset Epson printer to factory settings: Q&A
  • Ender 3 v2 Firmware Not Updating- Find & Fix!
  • Octoprint vs Klipper: Which One to Pick?
  • VzBot vs Voron: 7 Significant Differences!
  • PETG Layer Adhesion: How To Improve It?
  • Home
  • About Us
  • Terms of Services
  • Disclaimer
  • Contact Us

COPYRIGHT © 2022 · APRINTERTECH.COM, ALL RIGHTS RESERVED.