• Skip to primary navigation
  • Skip to main content
  • Skip to primary sidebar

A Printer Tech

True Reviews on Printer

  • Home
  • Printer
  • Budget
  • Buying Guide

PETG Layer Adhesion: How To Improve It?

June 23, 2023 By mfarooq012012

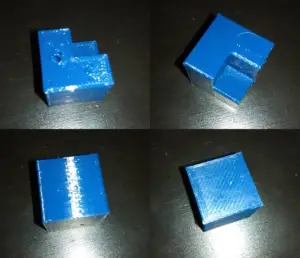
Compared to other 3D printer filaments, PETG causes fewer problems during layer adhesion. However, with some common mistakes, users still face some problems regarding this. 

So, how to avoid PETG layer adhesion issues?

To avoid PETG layer adhesion issues and get an effective outcome, adjust the nozzle temperature to the optimum level. Also, you have to use a good extruder. Increasing the layer temperature and reducing the cooling also makes the layering adhesion better. You should also adjust the print speed, first layer height, and PEI sheet. Don’t forget to dry the filament before printing. 

To know more about these methods, keep reading.

petg layer adhesion problem
Source: Prusa Research

How To Improve PETG Layer Adhesion?

You have to ensure different factors to ensure a proper PETG layer adhesion. To improve the PETG layer adhesion, you can follow the factors mentioned below. 

Adjust Nozzle Temperature:

Sometimes, the nozzle temperature of your 3D printer can be too cool while extrusion. In this situation, the filament will not smoothly flow on the surface. As a result, you will notice uneven layer adhesion. And the layers will separate from each other.

On the other hand, if the nozzle temperature is too hot, it will cause the filament to melt prematurely. And then slip out before it makes a layer with the previous layer.

PETG requires a higher nozzle temperature than other filaments like ABS. The melting point of PETG is 500OF or 260°C. But this filament will start to melt at around 446OF or 230OC. 

So, the nozzle temperature of PETG should be between 220°C to 260°C for the most effective PETG layer adhesion.

Use Good Extruder:

Along with adjusting the nozzle temperature, using a good extruder is also essential to ensure proper extrusion. Here are some good quality 3d printer extruders you can choose from.

Flex3drive G5: This lightweight extruder makes PETG layer adhesives more improved and provides consistent extrusion. 

Bondtech BMG: Due to its extremely lightweight, it will provide excellent printing speed and accuracy. 

Micro Swiss Direct Drive Extruder: This extruder provides a better grip force between the extruder and the filament. As a result, you will get an improved layer adhesion.

Or follow a 3D printer buying guide for better suggestions. 

Increase Layer Temperature:

If the temperature between the two layers of the PETG is low and inconsistent, the bonding will be weak. If you are thinking, why are my PETG layers not sticking to each other, this can be a reason. 

For getting the best result during layering, increase the temperature 25O C above the recommended temperature. It will force the two layers to stick more effectively together.

Make sure your 3D printer has the right temperature capacity for your PETG printing. VzBot and Voron have many differences, but both are great brands for PETG printing. 

Reduce The Cooling:

Along with increasing the temperature, you also have to reduce the cooling during PETG layer adhesion. 

When you let one layer cool down before setting another layer, the previous layer gets cold and warped. The cooling fan destroys the layer adhesion even more. 

So, keep the fan off while depositing the first few layers. After that, turn on the fan and gradually increase the speed. Remember that, when the layering is done, you have to increase the cooling setting and let the PETG solidify. 

Here is a suggested fan speed level for different layers. 

  • First Layer: 0%
  • Second Layer: 0%
  • Third Layer: 50%
  • Fourth Layer: 75%
  • Fifth Layer +: 100%

Adjust Print Speed:

When the print speed is too fast, the layers don’t get proper time for adhesion. And it causes poor inter-layer bonds. 

The optimum printing speed for PETG is between 60 mm/s to 100mm/s. Keeping the speed at the lower side of this range will ensure better layer adhesion. 

However, in this case, you have to make sure the travel speed is higher than the print speed. For example, keep the travel speed to 120mm/s while the print is at 90-100 mm/s. Otherwise, you will face other printing problems including stringing. 

Adjust PEI Sheet:

If your PEI sheet or printing bed is smooth and textured, the layers will get more adhesion. To optimize the PEI sheet you are using, you can sand the sheet. For this purpose, use 100-300 grit sandpaper. 

Adjust First Layer Height:

For having an optimum layer adhesion, setting the first layer in the right way is very important. And in this case, you have to adjust the first layer height to an optimum level. Having a 0.20 to 0.28 mm height for the first layer will ensure better PETG layer adhesion.

Having good printing software is important to ensure the settings are correctly following your instruction. You can choose between Octoprint and Klipper, they are both great. 

Dry Your Filament:

Filaments like PETG absorb too much moisture from the air very easily. And as a result, when you put them under heat, the moisture turns to steam. And it messes up the adhesion of the layer. 

So, you have to dry the PETG before using it for maximum benefit. To dry it out, use a filament dryer, your oven, or a food dehydrator. If you are drying it in the oven, you have to set the temperature around 60°C-65°C. And then dry the PETG for 4-6 hours. 

If you want to use a dedicated filament dryer, the following video might help you with the process. 

By following these factors, you can avoid PETG layer adhesion problems and get optimum results. Here’s a tip. Make sure the firmware of your printer is regularly updated. Sometimes, the firmware like Ender 3 v2 doesn’t update. And as a result, you face many problems during printing.

3D Printing
Source: 3D Printing

Frequently Asked Questions (FAQs):

What Are The Problems With The PETG Layer?

The problem with the PETG layer is, this filament is very sensitive. You have to put the printing temperature, nozzle temperature, printing speed everything at a very optimal level. Too much or too little of these factors will cause the layer to come out really bad. 

What Causes PETG To Clog?

Excessive nozzle temperature and lack of cooling can cause PETG to clog. Due to the extreme heat, the filament melts prematurely on the nozzle and gets stuck there. You need to clean the nozzle and adjust the temperature for future use. 

Is PETG More Waterproof Than PLA?

Yes, PETG is more waterproof than PLA. PLA is not very water resistant. If you are looking for a filament that is more durable, PETG is the one. It is also more resistant to chemicals and fatigue than PLA. 

Conclusion 

Here goes all the discussion on how to avoid the common PETG layer adhesion problem and get effective outcomes. Try following the suggestions and you will see excellent results in no time.

That’s all for today’s discussion. See you soon with another printing topic. Until then, have a great day!

Read also: How to clean a printer

Filed Under: Printer

Printer IP Address Won’t Load In Browser

March 31, 2023 By mfarooq012012

Yes, printer’s IP addresses sometimes don’t work in browsers. I have faced the same issue recently with my new printer. And I followed the steps provided in this article, to seek out this issue. 

So,why is your Printer IP Address not Loading in Browser?

Your printer IP Address isn’t loading in the browser because there could be connectivity issues, communication issues with the printer control panel, problem with the Internet proxy server settings, and issues with not updating the printer and router firmware properly. 

The solutions of these problems are quite simple.We’ve addressed all of these possible reasons and solutions. 

Do you want to know more? Keep reading; you will get there!

5 Solutions to Load Your Printer IP Address in Your Browser

I have already mentioned the reasons. The table below lists their solutions.

Have a look!

Reasons Quick solution
Connectivity issues Restart  your router, printer, and computer
Problems with the printer control panel’s communication system Any communication problems with the printer control panel may be resolved by enabling Web Service using the printer’s EWS.
Internet proxy server configuration problems For networks that use proxy servers, update the Web Services settings in the printer’s EWS using the proxy information.
Not updating the printer firmware From the HP website, download any available firmware updates.
Not updating the router firmware Older router firmware may have an impact on the device’s functionality, security, or ability to connect to the Internet.


So, that was a quick solution to the Printer IP Address problem. Yet in the next parts, we have a thorough explanation for each of them. Follow along!

Solution 1: Restart the router, printer, and computer

Restarting the computer, printer, and router will usually fix connectivity issues. Before continuing, finish any tasks or downloads that are in process. To find the problem and fix it, take the actions listed below.

Step 1: The router must first be turned off by pushing the power button or removing the power cord.

Restart the router
Source: akshatblog.com

Step 2: In the next step, you need to disconnect the printer from the power cable. 

Step 3: Then, shut down your computer after closing any open programs. 

Step 4: When the Internet activity light shows a normal connected status, press the power button or reattach the router’s power cord. 

Step 5: Connect the printer with the power cable.

Step 6: Turn on the computer.

This might solve your problem and if not then go to the next one.

Solution 2: Enabling Web Service using the printer’s EWS (Embedded Web Server)

Any communication problems with the printer control panel may be resolved by enabling Web Service using the printer’s EWS. 

Step 1: First, you need to print a Network Setup Page. There are two methods.

  • Control panels for printers with LCDs and text: You can print your page from the Wireless, Network Settings, or Setup menus.
Control panels for printers
Source: old.pantum
  • Printers with simple (buttons-only) control panels: Use the following button combinations on the printer control panel to print the page. On certain printers, press the “Wireless” and “Information” buttons at the same time. On other printers, press the “Wireless” and “Start Copy Black” buttons at the same time.
control panels
Source: knowils

Note: If you are an HP printer user, you can visit “HP Customer Help”. To find more detailed instructions on printing a network setup page, simply input your printer model and then look for the paper headed “print a self-test page.”

Step 2: Find the URL(s) for the embedded web server on the Network Settings Page. Next, carry on with your troubleshooting after reconnecting your printer to the network.

The URL(s) for the embedded web server address can be found in the table below.

Network Settings Page
Source: h30434.www3.hp.com

Step 3: After that, you need to open a web browser (Internet Explorer, Chrome, Firefox, or Safari) on your computer to enter the URL

Step 4: In the browser’s address field, type the URL for the EWS, and then press Enter. You need to make sure the IP address is typed into the Internet browser’s address field. When you enter a search term into a toolbar search box or search engine, the EWS does not open.

type the URL
Source: HP support

Step 5: If a web security certificate displays, select continue to open the printer homepage.

web security certificate displays
Source: HP support

If a login window appears, for the username,  type “admin”.

login window
Source: HP support

Then type the PIN found on the sticker on the back or below your printer, or the password that the printer administrator has set, for the password.

PIN found
Source: HP support

The printer’s EWS homepage loads, indicating that it is connected to the computer’s network.

Step 6: Click the Web services option on the EWS website.

EWS website
Source: danstechnicalservices

Step 7: Click Proceed, Turn On, or Enable on the Web Services setup page, then adhere to the on-screen directions.

If the problem continues, move on to the next step.

Solution 3: Check the settings for the Internet proxy server

For networks that use proxy servers, you have to update the Web Services settings in the printer’s EWS using the proxy information. This issue can also cause your printer not get verified on the network. Steps to do this are as follows.

Step 1: To proceed, you must Locate the Internet proxy settings. I have the instructions for both Windows and Mac users, so you may choose whichever you need.

For Windows: If you use Windows, you may find the proxy settings for the internet by following the steps below.

  • Type “Internet” into the search box. When the results appear, you need to click Internet Settings. 
  • After that you need to click the Connections tab to choose your network. Next, in the Internet Properties window, choose Settings.
  • The proxy settings are displayed in the network settings menu.
proxy settings
Source: h30434.www3.hp.com

For Mac: If you use a Mac, you may find the proxy settings for the internet by following the steps below.

  • First, You need to choose a network under System Preferences. This will assist you in choosing a web proxy.
  • After that, you have to select your proxy by clicking the Advanced button, the Proxies tab, and the Network window.
Network window
Source: h30434.www3.hp.com

Step 2: For your proxy server connection, note the Address and Port settings.

Step 3: Click the Web Services tab on the EWS, then select Proxy settings.

Step 4: Click Apply after entering the Address and Port information for your proxy server connection.

Step 5: This will activate your Web Services.

Solution 4: Update the Printer Firmware

Through the HP website, you may upgrade your printer’s firmware. The steps are listed below.

Step 1: While the printer is on and linked to the computer, you must select your printer by going to HP Customer Help – Software and Driver Downloads.

Step 2: After that, you can download any available Firmware upgrades. 

Step 3: Then install the Firmware upgrades.

This process can also fix any blue screen error issue in your printer.

If you face any problem, you can cite the relevant document Update or Upgrade Printer Firmware for HP Printers for more information.

Solution 5: Update the Router Firmware

The performance, security, or ability of an outdated router to connect to the Internet may all be compromised.

Step 1: To begin, launch a browser, type the router’s IP address into the address box, and then press Enter.

Step 2: Log in to your router’s web-based setup page if necessary.

Step 3: Look for the firmware upgrade option.

Note: For more information, you can check your router’s manual or get in touch with the manufacturer.

Frequently Asked Questions (FAQs)

How do I fix 192.168 1.1 refused to connect?

First, make sure that you’re connected to the right network and that your computer or phone hasn’t joined another network by mistake. If the issue still exists, move on to the following strategy.

Second, If you’re using Wi-Fi, try to connect via a cable connection from a computer.

How do I open printer settings in the browser?

Click the three vertical dots in the upper right corner of Chrome after finding the page you want to print to bring up a drop-down menu with options and settings controls.

To access the printer settings, click “Print.” According to Google Support, pressing “Ctrl+p” on your keyboard will bring up the identical printer settings option.

Is There Any Default IP Address for A Printer?

The printing server’s IP address will almost certainly match the router’s IP address. To find your router’s IP address, use the Start menu Search box to open a command prompt. Enter the command ipconfig. The Default Gateway entry will have the IP address under it.

How do I access the Zebra printer web interface?

First, you need to select View and modify Printer Settings. Then, enter the password 1234. After that, follow the steps mentioned below.

  • From a PC connected to the printer’s network, open a browser window.
  • Type the IP Address of the printer into the browser’s URL address window.
  • The printer’s web page will be displayed.

Conclusion

We hope this solved the problems regarding your Printer IP Address not Loading in Browser.

Here are some extra tips for your printer. You should impose restrictions on printer access, turn off unused protocols, check the firmware level of your printer, and be wary of automatic reporting of printer activity. 

These precautions will keep your printer secure and safe.

That’s the end of this article. Let us know what printer topic you want to hear from us about in the future.

Until then, good luck with your printer!

Filed Under: Printer

6 Easy Ways To Fix Your Hp Printer Error Code Ebs00p0004!

March 31, 2023 By mfarooq012012

Well, ebs00p0004 HP printer error shows on the HP printer when it’s time to set up the device. 

So, what are the reasons behind showing this error? And solutions?

You are getting the error ebs00p0004 because you are not connecting the wifi direct or USB cable to print. This is the most frequent cause of this issue. 

You can fix this by disabling the privacy separator feature, connecting the wifi direct, resetting your printer, uninstalling and reinstalling all the printer software and driver, and lastly, you need to install the latest firmware update. 

Now, let’s discuss in detail the solutions that how you can fix this by yourself. 

What Is Ebs00p0004 Hp Printer Error?

ebs00p0004 printer error code
Source: h30434.www3.hp.com

This problem occurs when you want to set up your new Hp printer or at the time of installation. Let’s look into the reason behind it.

This can happen when two or more devices use wifi to connect to the same mobile router. The mobile router’s privacy separator feature prevents devices from communicating with one another. The printer cannot be reached by the computer or a mobile device.

And then, you can see the error code ebs00p0004 on your printer. If you are already connecting to the wifi but still have this error, then you may update your firmware. 

Now, let’s move on to the solutions. 

How to Fix Ebs00p0004 Hp Printer Error

You can fix the ebs00p0004 HP printer error in many different ways. The solution will be different according to the printer you are using. However, you can try to fix the issue through the solutions below. 

Solution 1: Disability of privacy separator feature 

You need to Disable the privacy separator feature in the mobile router. After completing the setup, you can print without error. How to disable the privacy separator feature? Take a look!

Step 1: You can use a web browser to check the settings of the wireless access point. 

Step 2: Search the privacy separator feature. 

Step 3: Turn it off

Turn it off
Source: Fujitsu

Step 4: If you can’t find the website of your wireless access point, contact the manufacturer. 

Depending on the router you use, the privacy separator feature might not be disabled as well. In that case move onto the next solution 

Note: you may find alternative names for this feature such as- Client isolation, AP isolation, or Intra-BSS communication.

Solution 2: Connect direct wifi or USB cable 

Connect direct wifi or USB cable
Source: star

Another way is, you can just connect the wifi direct feature to print. Or you can simply use the USB cable connection for printing. 

Kindly note that some printer models are not wifi compatible printers. Hence, it can only be connected via USB cable to some specific model series such as HP Photosmart C4600 All-in-one.

So, if you already connected the wifi feature, it is not working. Then you need to try the USB cable if you are not sure about the printer’s connectivity.

Solution 3: Resetting your printer

If the above solution doesn’t work for your printer, You can simply reset it. 

Step 1: If the printer is not already on, turn it on. 

Step 2: Before proceeding, make sure the printer is turned off and silent.

Step 3: Disconnect the power supplying plug from the back of the printer.

Step 4: Remove the power plug from the wall socket.

Step 5: you have to wait at least one minute. 

Step 6: Re-insert the power cord into the wall socket.

Step 7: Reattach the printer’s power cord to the back of the device.

Step 8: Turn on the printer, if it doesn’t automatically turn on. Now check the control panel display. 

NOTE: HP advises plugging the printer’s power wire straight into a wall outlet.

Resetting your printer
Source: support.hp

Congratulations! Your HP printer has been successfully reset. Now, I hope it will work for your issue and you can print it. 

However, do not try to mix up the cold reset and hard reset of hp printers.

Solution 4: Uninstall and Reinstall all the printer software

You can try this solution if all the above solutions can not fix your problem. In this term, You have to remove all the hp printer-related software and drivers from your computer and again reinstall them. To perform this on your computer let’s first look into uninstalling: 

Uninstalling Your HP Printer:

For this procedure, you can simply check the steps below. Here, I have discussed how you can easily find the software, and drivers and uninstall them. 

Step 1: Search in the search bar of your PC “Programs and Features”. Then click on that in Windows.

Step 2: You need to select your HP printer and Uninstall it.

Step 3: Now, find the Devices and Printers.

Step 4: Remove your HP printer from the Devices and Printers window. 

Step 5: Using the “Windows Key + R” key combination, launch the run command.

Step 6: you need to enter printui.exe /s and then click on OK.

Step 7: Select the Drivers tab.

Step 8: Also remove the HP Printer driver from the list.

Step 9: Remove all instances related to the same HP printer.

Step 10: Click on Apply and OK on the Print Server Properties windows.

Step 11: Close Devices and Printers. 

Step 12: Restart the PC again.

If you want to watch any video for this procedure, you can watch this-

By this process, you can easily uninstall all your printer software, and drivers

Reinstall your Hp printer:

After uninstalling your printer and printer-related software and drivers, you need to reinstall them all again. Go to the Software and Driver Download section of the HP customer support, and enter your device name or model that is required. 

And choose your Hp printer driver and management software. 

Solution 5: Download and install HP smart app. 

configuring the HP smart app
Source : support.hp.com

If you already installed it before then you have to remove this app. And again install the app.

Download the HP smart app from 123.hp.com (Android, Apple, iOS),  HP Smart – Microsoft Store (windows), or  HP Smart – Mac App Store (MAC)

You will need to create an HP account If this is your first time configuring the HP smart app.

Solution 6: Download the printer firmware to install the latest update

printer firmware to install the latest update
Source: metrofuser.com
  1. First, check that the printer is turned on and connected to the computer.
  2. Then, you need to enter your printer model in the HP Software and Driver Downloads site.
  3. After choosing the firmware option from the list, hit the update’s download link, and then adhere to the directions.

(note: If you can’t find a firmware option, your printer does not need any firmware update.)

  1. Then you have to check your printer’s status on the printer update screen. 
  2. If you can’t see your network printer, temporarily connect it to the computer with a USB cable. then refresh it and wait 20 seconds. 
  3. If the status is ready, select the check box next to the serial number and then click update.
  4. If the status is displaying “current”, then you’re using a printer that’s firmware is up to date.

So, that’s all about this process. And if you are trying this solution, you may need to perform some more activities with your router and printer such as restarting these two. 

This firmware update can solve many issues with your printer, as well as the printer’s Ip not loading in the browser issue.

FAQs: ebs00p0004 HP printer error

Why Does My HP Printer Show Error Code?

This error code may appear for a number of reasons, including hardware problems, firmware issues, or cable problems. If the error code still appears, you can upgrade the firmware after using the reset procedures described at the top of the page. You can also try using alternative printer cables.

Why is HP Ink so Expensive?

The high cost of supplies for inkjet and laser printers is frequently attributed to research and development. According to HP, the company invests $1 billion annually in R&D and has more than 4,000 patents covering just consumables like ink and toner cartridges for laser printers.

Can I Use Any Type of Ink for my HP Printer?

Yes, you can use ink from a compatible or unofficial brand in your printer. Lower priced printer cartridges from third-party companies are available for almost every popular printer model and can save printer users thousands on printing costs every year.

Conclusion: ebs00p0004 HP printer error

Thank you for being patient till the end. We tried to resolve the problem of the ebs00p0004 hp printer error. Hope it helps you. Kindly note that this problem and solutions may depend on the variety of the model of HP printer. 

These are some basic solutions for ebs00p0004 HP printer error that you can fix. You should get in touch with the HP support team if these don’t work for you.

Read also: HP Printer Blue Screen Error

Filed Under: Printer

Hp Instant Ink 64/303 Compatibility: Cartridge Error and Solution.

March 31, 2023 By mfarooq012012

HP Instant Ink cartridges are more durable and contain more ink than conventional ink cartridges. Some of the HP Instant Ink cartridges are bigger than others.

So, How to fix issues with hp instant ink 64/303 compatibility?

HP envy photo 6220, HP envy photo 6230, HP ENVY 6234, HP envy photo 6255, HP envy photo 7130, HP envy photo 7134, HP envy photo 7155, HP envy photo 7830,  HP envy photo 7855, HP Tango series and some others HP printer are compatible with Hp Instant Ink 64/303. In some cases, the printer did not recognize the instant ink compatibility. Even though you have a compatible ink cartridge the printer might show error messages. 

There are several things you can do to try and resolve the issue:

Make sure the cartridge is installed correctly, Clean the contacts, Restart the printer, Update printer firmware etc.

Do you want to know in detail? Keep reading; you will get there!

Which Models are Compatible With Hp Instant Ink 64/303?

To check if your printer is compatible with HP Instant Ink and which ink cartridges it requires, you can visit the HP Instant Ink website and enter your printer model.

The HP website will provide you with information about which ink cartridges are compatible with your printer and which plans are available for your printer model.

Compatible ink is produced by third-party producers specifically for use in designated printers without infringing on the patents held by the original printer makers. There is a range of packaging options for compatible inks and toners, including sealed plastic wraps and taped plastic wraps.

Hp instant ink 64/303 is compatible with the printer. HP Instant Ink cartridges last longer than standard ink cartridges because they contain more ink. Physically, some HP Instant Ink cartridges are also bigger than others

Bellow Table gives compatible HP Instant Ink 64/303 cartridges Printer. By this product list, someone can easily buy a Compatible Hp instant Ink 64/303 cartridges printer.


Hp Instant Ink 64/303 Compatibility
 cartridges Printer

HP ENVY Photo 6200
HP ENVY 6234
HP ENVY Photo 7100
HP ENVY Photo 7800
HP ENVY Photo 7900
HP Tango 
HP envy photo 6220 
HP envy photo 6230 
HP envy photo 6255
HP envy photo 7130
HP envy photo 7134 
HP envy photo 7155
HP envy photo 7830
HP envy photo 7855

For details about Hp instant ink 64/303 compatibility products keep reading the content.

What Error Messages You Might See if There is a Compatibility Issue?

There are several types of errors that might occur when installing a cartridge in your printer, The error message will look like these,

  • There will be an error message as “toner is not compatible”.
  • The notice “printer cartridge not detected” will appear if the printer is unable to identify the ink.
  • low or empty levels of ink might be shown on your screen.
  • There can be some errors like “cartridge error”, “HP cartridge locked”, ” Cartridge protection enabled”, and “HP ink cartridge not compatible”.
  •  There can be some warning messages like, “no cartridge installed”, and “cartridge not recognized”
Hp Instant Ink 64/303 Compatibility
Source: giant

Troubleshooting the cartridge Compatibility issues of the HP Instant Ink printer

When changing or replacing an empty cartridge, one of the most frequent problems experienced by printer owners is the printer not recognizing a new ink or toner cartridge. Here, we attempt to troubleshoot various issues. 

These methods also help with other printer problems including printer validation failure.

Problem 1: An internal memory reset is needed

Your printer should use its sensor to recognize whether a new cartridge is replaced or not. After detecting a new cartridge it should reset its internal memory.

Also ensuring that it has full ink and toner levels by displaying it. But in some case, the printer doesn’t recognize a new cartridge correctly and believe that the cartridge was an older one, or no cartridge is currently inserted. To solve this problem follow bellow details:

Solution: Reset the printer

If you face an Insufficient Memory issue, you can follow the below steps to overcome the problem of printer error or failure.

Step 1: Put the old cartridge instead of the new one. Idle your printer for 10 minutes. Don’t do anything with this in the meantime.

Step 2: Now put the new cartridge instead of the old cartridge. This swapping technique solves the problem in maximum cases. Stop here if it will work. However, if you’re still facing the problem keep reading.

Step 3: Remove the new cartridge. Make sure the cartridge is stored in a cool, dry, and secure location.

Step 4: Shut down the printer using its power button

Step 5: Unplug your printer from the wall. The printer will stay in sleep mode if you merely click the power button on the printer control panel, so be sure you execute steps 4 and 5 independently. For the next ten minutes, just let your printer sit like this.

Step 6: Plug your printer into the wall again (Don’t press the power button immediately)

Step 7: Put the new cartridge in again.

Step 8: Press the power button again.

For more knowledge, you can see the video. 

Resetting the memory will also help you if you are facing the printer installing error 283 on windows.

Problem 2: The protective strips have not Yet been removed

You forgot to remove the protective covers or plastic strips of the cartridge which are attached to a new cartridge while it packing.

Solution: Remove the protective strips of the new cartridge

Most cartridges have tape that must be removed before installation. We recommend opening each new cartridge and removing the tape over the garbage. When you prepare the cartridge for the printer, a small amount of ink or toner may escape from the cartridge.

Ink Cartridge: 

The tape on an ink cartridge covers the cartridge’s vent hole. If you insert the cartridge with the tape still connected, the cartridge will not be able to print. 

The tape is normally located on the top of the cartridge and is yellow or orange in color. To remove, carefully peel the tape away from the cartridge. It should simply remove from the cartridge.

We’ve listed two of the most common ink cartridges(integrated print cartridges and individual ink cartridges) below. The printhead is embedded inside an integrated print cartridge. An individual ink cartridge operates with a printhead incorporated inside the printer.

Hp Instant Ink 64/303 Compatibility
source: Help Center
Hp Instant Ink 64/303 Compatibility
source: Help Center

If you want to gather more knowledge, let’s check out the video. 

Toner Cartridges:

Most toner cartridges have a strip of sealing tape protruding from the side to protect it during travel. Gently drag the tape out and across the toner towards the dustbin to remove it. When you pull on the tape, you’ll notice it’s a lengthy strip. 

Before inserting the toner, be certain that all of the tapes have been removed.

Toner Cartridges
Source: Help Center

If you want to know more information about this, let’s check out the video. 

Problem 3: Dirt or damaged objects can stop data from being read. 

Sometimes, the new cartridge has some dirt or metal obstacle, which can stop the printer.

Solution: Clean your cartridges

Depending on the type of cartridge, cleaning methods can be different. Below are the different types of instant ink cartridges types.

Clean your cartridges
Source: Support. hp

As hp instant ink 64/303 is a type C instant ink cartridge. We will explain here the cleaning process of types C instant ink cartridges.

Reinstall the Cartridge:

Take out the offending cartridge and put it back in its corresponding colored slot.

  • Activate the printer.
  • Open the door so you may access the cartridges.
  • Before continuing, wait until the carriage has stopped moving.
  • The carriage that was indicated in the error message’s error message should be removed.

Carriages with cartridge latches: After disabling the lock, lift the cartridge to remove it from the slot.

Carriages with cartridge latches
Source: Support. Hp

Carriages without cartridge latches: To remove the cartridge from its slot, press down lightly on it.

Carriages without cartridge latches
Source: Support. Hp
  • Verify that the contact’s protective tape has been taken off. (Do not come into contact with the ink nozzles or the copper-colored electrical strip.)
protective tape
Source: Support. Hp
  • Replace the cartridge. The black cartridge should be placed in the right slot, while the tri-color cartridge should be placed in the left slot.
  • If necessary, follow these steps again with the second cartridge.
  • Close the access door to the cartridges.
  • Look for an error message.

Ensure that the electrical connections are clean: 

Remove any ink or dirt from the cartridge connections and the carriage.

  • Activate the printer.
  • Open the door to get access to the cartridges, then take one out when the carriage has stopped moving.
  • To clean the cartridge’s copper-colored contacts, use a lint-free cloth dampened with distilled water.
electrical connections are clean
Source: Support. Hp
  • Spray some distilled water onto a lint-free cloth or swab, then use it to wipe off the electrical connections in the carriage.
electrical connections in the carriage
Source: Support. hp
  • Before replacing the cartridge into its corresponding color-coded slot, let the contacts 10 minutes to dry.
  • Use the other cartridge and follow these directions if the error message instructs you to.
  • The door or lid to the cartridge access area must be closed.
  • Clean the cartridge and carriage contacts once again if the issue still exists.

Problem 4: HP Cartridge Protection is enabled

Firmware updates for HP printers are not uncommon, and it is possible that an update can “activate cartridge protection,” rendering HP ink cartridges incompatible with printers that do not use the same software. 

Cartridge protection may potentially prevent compatibles from working at all on your computer.

Solution: Update Firmware

HP regularly updated its printer firmware version with product issue fixes. Check if there is any available firmware update for your printer from the HP website and install it. There are two types of printer updates,

For non-internet printers: 

Step 1: Choose your HP printer from the list of available devices and printers in your settings menu.

Step 2: Locate the cartridge protection tab in the HP toolbox and disable cartridge protection before saving.

For internet-connected printers: 

Step 1: Go to your printer’s settings menu and look for your printer’s i.p address. 

Step 2: Take note of this and enter it into a browser search bar to be directed to your printer setup page.

Step 3:  Disable cartridge protection by clicking settings.

internet-connected printers
Source: Giant

After following the steps, If your network is unable to verify your printer, you may want to contact HP for help. They are valuable for issue analysis and advice expansion.

Problem 4: An Ink cartridge has not been inserted in its slot correctly

If an ink cartridge isn’t fully inserted into its correct slot, the printer won’t recognize it and will display an error message. 

All you have to do now is lift your cartridge cover again and double-check each of the inserted cartridges to ensure that they are correctly clicked in, then close the cover and try again.

Broken plastic pieces in toners can occasionally cause the toner to not seat properly in the printer slot. Changing the cartridge should fix the problem.

Solution: Verify the proper cartridge insertion:

Verify the proper cartridge insertion
Source: wiki How

Make sure the cartridge is firmly set in its slot by pressing down on it with your finger. Just do what I say down here,

Step 1: Open the ink tray in the printer’s center.

Open the ink tray in the printer's center
Source: wiki How

Step 2: To replace the printer’s ink, take out the old cartridges.

replace the printer's ink
Source: wiki How
  • To extract the cartridge, depress the button. By doing this, the ink holder will release it.
  • When you feel a click and see the empty ink cartridge pop out, take it out completely.
  • For each color, certain HP printers utilize different cartridges. The method is the same regardless of the kind of printer you have. Simply take out each cartridge that has to be changed one at a time.

Step 3: Open up the brand new ink cartridge.

brand new ink cartridge
Source: wiki How
  • Remove the new cartridge from its package.
  • Your cartridge will have one of two tops, either blue or black unless you have separate cartridges for each color. The cartridge with the blue top contains your colored ink. The cartridge with the black top contains your black ink.
  • Take the ink cartridge’s protective tab off. This plastic film shields the cartridge’s ink-dispensing section.
  • Keep your hands away from the ink nozzles and the copper-colored surface of the cartridge. If your fingerprints leave a mark, they may clog, fail to print, or disconnect.

Step 4:  Insert your new ink cartridges.

Insert your new ink cartridges
Source: wiki How
  • Your cartridge should be inserted into the slot with the ink nozzles facing you.
  • Near the ink number label on the top of your ink cartridges, there are two tiny plastic tabs. These tabs need to be nearby. Verify that the nozzle of the ink is pointed away from you.
  • The left side is where the color cartridge is placed. New ink cartridges should be inserted.

Step 5: Shut the ink cartridge door.

  • When the door is correctly closed, the cartridges will glide back into position.

FAQs: 

Hp Instant Ink 64/303 Compatibility

What does Instant Ink compatible mean?

You don’t need to download any additional software to use the subscription service while using an instant Ink ready printer. It will monitor the ink level automatically. then sends you a replacement to ensure that you have the ink or toner you require when you require it.

What are Instant Ink ready Printers?

If your printer automatically interacts with HP to check your ink and toner levels in real-time and then sends you a replacement to ensure that you have the ink or toner you require when you need it, then it’s called an Instant Ink-ready printer.

Difference Between Instant Ink and Standard Ink?

Cartridges for Instant Ink are obviously bigger and can store more ink than those for Regular Ink. Because of this, instant ink lasts longer than regular ink.

Conclusion: 

Hp Instant Ink 64/303 Compatibility

Here go all the common problems and solutions with hp instant ink 64/303 compatibility. I hope after reading this article, you can easily troubleshoot any problem you are facing with your hp instant ink 64/303 Cartridge. But during solving the problem careful about the steps, and do the instruction properly as instruction.

My discussion is over now. good luck and keep proper troubleshooting!

Read also: HP Printer Blue Screen Error

Filed Under: Printer

Understanding Ink Consumption: Does Photo Paper Use More Ink?

March 31, 2023 By mfarooq012012

Printing images on photo paper can provide better-quality pictures. But this leads many people to question whether using photo paper is worth the added expense and potential ink usage.

So, does photo paper use more ink?

It’s true that printing photographs on photo paper use more ink than printing on conventional paper. The kind of printer, ink cartridges, print quality settings, and type of paper all affect how much ink is used when printing a photo. But it’s important to choose the correct paper type for your printer and adjust the print quality settings accordingly to reduce your ink usage.

However, using photo paper doesn’t necessarily mean you’ll use more ink overall. To know more about photo paper let’s dig into the next part.

Why Does Photo Paper Use More Ink Than Regular Paper?

does photo paper use more ink in printer paper
Source: Amazon

Yes, it’s right that photo paper requires more ink than regular paper. Basically, a special coating on photo paper allows it to absorb more ink. So let’s know about coated and uncoated papers.

Differentiating FactorPhoto Paper Regular Paper
Surface TypeIt has a surface coating that is applied to one or both sides of the paper.It has a rough surface compared to coated paper.
Material Made ofBinders and pigments is combined with clay or other minerals to create the coatingUsually made from wood pulp or recycled fibers
TextureA photo paper can have a glossy, matte, or satin texture.It fulfills everyday printing needs like forms, flyers, envelopes, etc.

Coated Paper(Picture Paper):

Coated Paper
Source: Twitter

Coated paper is a type of paper that has a surface coating that is applied to one or both sides of the paper. Typically, binders and pigments are combined with clay or other minerals to create the coating.

This coating gives the paper a smooth, glossy surface that enhances the sharpness, and gives finer details, and vibrancy to printed images.

Depending on the kind and quantity of coating used, a photo paper can have a glossy, matte, or satin texture. This shows that more ink is required in order to print on picture paper with the proper quality standard.

Uncoated paper(Regular Paper):

Uncoated paper is usually made from wood pulp or recycled fibers and has a relatively rough surface compared to coated paper. For everyday printing needs like printing papers, forms, envelopes, or flyers, uncoated paper is frequently utilized.  

Compared to coated papers, this can make prints less precise and detailed, and it can also cause the ink to bleed, especially when using cheap or thin paper.

The decision to choose picture paper is not the only method that might affect the amount of ink utilized. So let’s know about it more.

Factors that Affect the Consumption of Ink 

There are various factors that can affect the consumption of ink while printing. Those are-

Types of printers:

Depending on the technology utilized, many printer types may consume more or less ink. For instance, laser printers frequently use less ink than inkjet and dye-sublimation printers. To produce an image, inkjet printers spray microscopic ink droplets onto the paper. 

Dye-sublimation printers use a heat transfer process to produce prints that are resistant to fading and water damage.  On the other hand, laser printers are not commonly utilized for picture printing as they are not intended to provide high-quality, colorful prints.

However, generally speaking, dye-sublimation printers tend to use more ink than inkjet printers because they produce high-quality, full-color prints with a wide range of colors. Depending on the print resolution, paper type, and printer settings, inkjet printers’ ink consumption might vary.

Coated Paper(Picture Paper):

Coated paper is a type of paper that has a surface coating that is applied to one or both sides of the paper. Typically, binders and pigments are combined with clay or other minerals to create the coating.

This coating gives the paper a smooth, glossy surface that enhances the sharpness, and gives finer details, and vibrancy to printed images.

Depending on the kind and quantity of coating used, a photo paper can have a glossy, matte, or satin texture. This shows that more ink is required in order to print on picture paper with the proper quality standard.

Uncoated paper(Regular Paper):

Uncoated paper is usually made from wood pulp or recycled fibers and has a relatively rough surface compared to coated paper. For everyday printing needs like printing papers, forms, envelopes, or flyers, uncoated paper is frequently utilized.  

Compared to coated papers, this can make prints less precise and detailed, and it can also cause the ink to bleed, especially when using cheap or thin paper.

The decision to choose picture paper is not the only method that might affect the amount of ink utilized. So let’s know about it more.

Factors that Affect the Consumption of Ink 

There are various factors that can affect the consumption of ink while printing. Those are-

Types of printers:

Depending on the technology utilized, many printer types may consume more or less ink. For instance, laser printers frequently use less ink than inkjet and dye-sublimation printers. To produce an image, inkjet printers spray microscopic ink droplets onto the paper. 

Dye-sublimation printers use a heat transfer process to produce prints that are resistant to fading and water damage.  On the other hand, laser printers are not commonly utilized for picture printing as they are not intended to provide high-quality, colorful prints.

However, generally speaking, dye-sublimation printers tend to use more ink than inkjet printers because they produce high-quality, full-color prints with a wide range of colors. Depending on the print resolution, paper type, and printer settings, inkjet printers’ ink consumption might vary.

Printer Settings:

printer settings
Source: expertphotography

Ink usage may be affected by printer settings like print mode and ink coverage. While printing with a high ink coverage level will use more ink, using a draft or eco mode will help you use less ink. Check this video to have better knowledge.

Print Resolution:

For a more detailed image, higher print resolutions require sprinkling more ink droplets onto the paper, which might result in greater ink usage(high-quality images – like 300 dpi = much more ink). 

On the other hand, lower print resolutions can result in lower ink usage since they require fewer ink droplets.

Document Size:

When printing a PNG image, the printer needs to use more ink to produce the high level of detail and color accuracy that is preserved in the image. PNG images have a better level of detail and color depth in contrast to JPEG pictures, which take less ink to create a similar degree of quality.  

PNG format does not lose any information during compression and keeps all of the original picture data. On the other hand, JPEG reduces the image file size by removing part of the material that is considered to be less significant. Also if your paper size is not perfect then your printer can print off-center. which can cause the wastage of ink sometimes.

Absorption Rate of the Paper:

It could take more ink to make a high-quality print on paper with a high absorption rate since the ink will spread out and be absorbed more quickly. The print quality may suffer as a result, losing sharpness and detail, and maybe requiring more ink.

By applying a certain ink coating to a surface and removing the unabsorbed portion after a predetermined amount of time, ink absorption is measured. 

Types of Ink:

Consumption of ink can vary depending on the kind of ink used, such as dye-based or pigment-based ink. Pigment-based ink may be more durable and use less ink than dye-based ink, which may also yield more bright colors. You’ll get more clear understanding after watching this dye-based vs pigment-based ink video guide.

Dye ink vs. Pigment Ink
Source: Youtube

Which Photo Paper Will Consume Less Ink?

There are several types of photo paper which is why it is confusing to use the proper one that consumes less ink. To make the paper selection process easier we are giving you some aspects.

Types of paperSurface TextureScale of ink consumption

Weight

(most 

common)

Print QualityCommonly Used For

Final Outcome

look 

Glossy Shiny, porous, and smooth.3120 gsm to 300 gsmColors appear vibrant with sharp contrast, give small detailsOutdoor photography such as nature photos and in outdoor modeling shots.More realistic & rich colors

Semi-

gloss

Middle of glossy and matte4200 gsm to 300 gsmGreater color saturation than matte photo paper. Ink dries quicker in it than glossy photo paper.Professional photography.rich colors
MatteFlat and Textured590 gsm to 300 gsmPictures look softer & Less vibrantBrochures and handouts.black & white photos
Canvas

-rougher and more porous surface

-matte-like paper finish

1190 gsm to 400 gsmThe colors here are much more vibrant when viewed from a distance.print big photos, for using frameskeeping the contrast and color.
Art Absorbent, porous 290 gsm to 300 gsmoffer varying degrees of contrast and colorLandscapes can create a painterly look

Note: Here, we are using the Ink Consumption Scale from (1-5). where the maximum and minimum consumption levels are 1 and 5, respectively. Because of having rougher, absorbent, and more porous surfaces canvas, art and glossy papers usually requires more ink.

Now, It is clear which paper consumes less ink but we also have to know various factors while choosing a perfect photo paper. So, let’s have a look.

Things to Keep in Mind While Choosing the Perfect Photo paper?

To produce prints that effectively showcase your images, you must use the correct photo paper. While selecting the ideal picture paper, keep the following in mind:

Durability and Longevity:

The durability and longevity of the paper can affect how long the print will last without fading or yellowing.  Search for photo papers that are fade-resistant, archival grade, and acid-free.

Whiteness:

The paper’s brightness and whiteness can influence how the colors in the picture appear. While slightly warmer white might give the image a more natural feel, dazzling white paper can make colors appear more vivid.

Compatibility:

Make sure the picture paper you select is compatible with both the ink type you’re using and your printer. Some papers are specifically designed to work best with certain types of printers or inks.

Price:

Lastly, think about the paper’s cost and whether it fits your budget. Higher-end papers may result in prints of a higher caliber, but they can also be more expensive.

Thickness and weight:

The paper’s weight and thickness can influence how the picture appears and feels. A lighter paper may be more cost-effective and adaptable, while a heavier paper may seem more solid and high-end. You can go through the paper weight guide for better understanding.

Does Printing Photos Always Require a lot of Ink?

The answer is no. Because if you maintain a regulated procedure you can easily control the usage of ink. In some cases, ink consumption can be substantial such as printing high-quality, high-resolution images and the picture itself (the darker the picture, the more ink you will use). 

So we should follow some guidelines initially to minimize ink consumption when printing photos, such as adjusting the print settings, reducing paper size and resolution, and using Pigment-based ink.

Also choosing a printer with an effective ink-use system can help you print images with the least amount of ink possible. For instance, some printers allow you to change simply the color that runs out rather than the complete cartridge since they contain separate ink cartridges for each color.

How to Reduce Ink Usage in a Photo Printer?

While printing photos can require a significant amount of ink, there are several ways to minimize ink consumption without sacrificing print quality.

Avoid Unnecessary Cleaning Cycles:

A lot of printers have a self-cleaning option that wastes ink.  Avoid running cleaning cycles too often as it can waste ink. Sometimes for a faulty printer, you can get roller marks on the paper while printing.so it’s necessary to clean the roller because this problem can destroy important information and cause ink wastage too. 

Reduce Color Saturation:

You’ll need to apply more ink the more vivid the colors are in the images. By lowering the amount of color in each image, you may save ink. This advice only applies if you don’t require photographs of the highest quality fit for an exhibition.

Consider Printing in Grayscale:

Consider Printing in Grayscale
Source: Brother Canada

When printing in grayscale, the printer only uses black ink, which is typically less expensive than color ink. Using the same amount of ink, more pages may be printed as a result.

You must switch the printer’s settings to grayscale or black and white in order to print in grayscale. Your printer model will determine the precise procedures to complete this, although they are typically listed in the printer software’s print options or preferences area.

Fixing

Get a Photography-Friendly Printer:

People who print a lot of high-quality images might find it wise to invest in a printer that is conducive to photography. So, here are some most popular printers in the market that you can choose.

Canon PIXMA Pro-100:

This printer creates vivid, high-quality prints up to 13×19 inches using 8 dye-based ink cartridges.

Epson SureColor P400:

This printer produces excellent prints up to 13×19 inches in size using 8 pigment-based ink cartridges. It can print on a number of paper types because of its superior media management capabilities.

HP Envy 4520:

It is a cost-effective all-in-one printer that can print high-quality photos up to 8.5×11 inches in size. It has possibilities for wireless communication and requires two ink cartridges.

Canon Selphy CP1300:

This is a portable printer that prints excellent photos up to 4×6 inches in size while you’re on the road. Prints that are waterproof and long-lasting are produced using dye-sublimation technology.

Overall, while printing often may not reduce ink usage, using the above techniques can help you reduce the amount of ink you use over time, which can save you money and reduce your environmental impact. 

Frequently Asked Questions (FAQs):

Does printing use more ink than photocopying?

To be able to generate rich graphics, printing may need extra toner or ink. Copiers, on the other hand, use less toner but create images that are less vibrant.

How much ink does printing photos use?

With typical coverage, 1 ml of ink will print 1 square foot on average. Hence, 36 square feet of printing should be possible with 9 ml (4-color) cartridges. 120 square feet of printing should be produced by four 30 ml cartridges. 440 square feet of printing should be produced by four 110 ml bulk bags.

Why do photographers prefer glossy paper?

The glossy paper enhances the vibrancy of an image’s colors. Glossy prints are not advised for vintage-style photography, such as photos printed in sepia or black and white, because the shine provides a contemporary touch to your photographs.

Conclusion

Now you have a clear idea Does Photo Paper Use More Ink or not? However, Utilizing picture paper doesn’t always result in using more ink overall. In fact, choosing the right paper might help you use less ink since the printer won’t require as much to get the appropriate print quality.

Read also: Dye Sublimation Vs Inkjet Photo Printer

Filed Under: Printer

  • « Go to Previous Page
  • Go to page 1
  • Go to page 2
  • Go to page 3
  • Go to page 4
  • Interim pages omitted …
  • Go to page 8
  • Go to Next Page »

Search

About US

Welcome to A Printer Tech! We are a team of passionate individuals who believe that printing should be easy, convenient, and affordable for everyone. Our mission is to provide high-quality printing services that meet the unique needs of our customers, whether they are individuals, businesses, or organizations.. Read more about us.

Categories

DMCA.com Protection Status

Most Popular

  • Why is my Canon printer printing blank pages: your best guide
  • Solving Windows cannot connect to the printer access is denied error
  • How to reset Epson printer to factory settings: Q&A
  • Ender 3 v2 Firmware Not Updating- Find & Fix!
  • Octoprint vs Klipper: Which One to Pick?
  • VzBot vs Voron: 7 Significant Differences!
  • PETG Layer Adhesion: How To Improve It?
  • Home
  • About Us
  • Terms of Services
  • Disclaimer
  • Contact Us

COPYRIGHT © 2022 · APRINTERTECH.COM, ALL RIGHTS RESERVED.